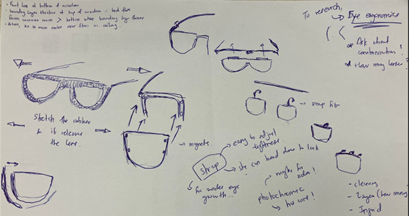
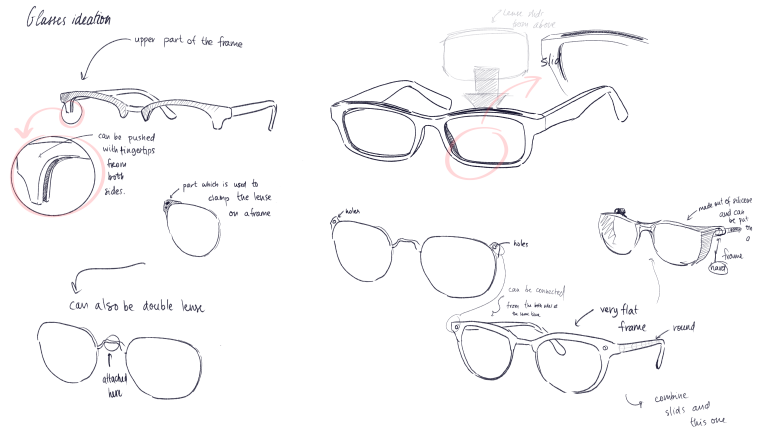
After the Co-design session it is now time for ideation. The Co-design session showed that the mechanisms to be incorporated into the product must be easy to use for the specific user. Using these Co-design results and the research into mechanisms (see Appendix A), we first made ideation sketches specific for different compontents (Figure 14,17,18)
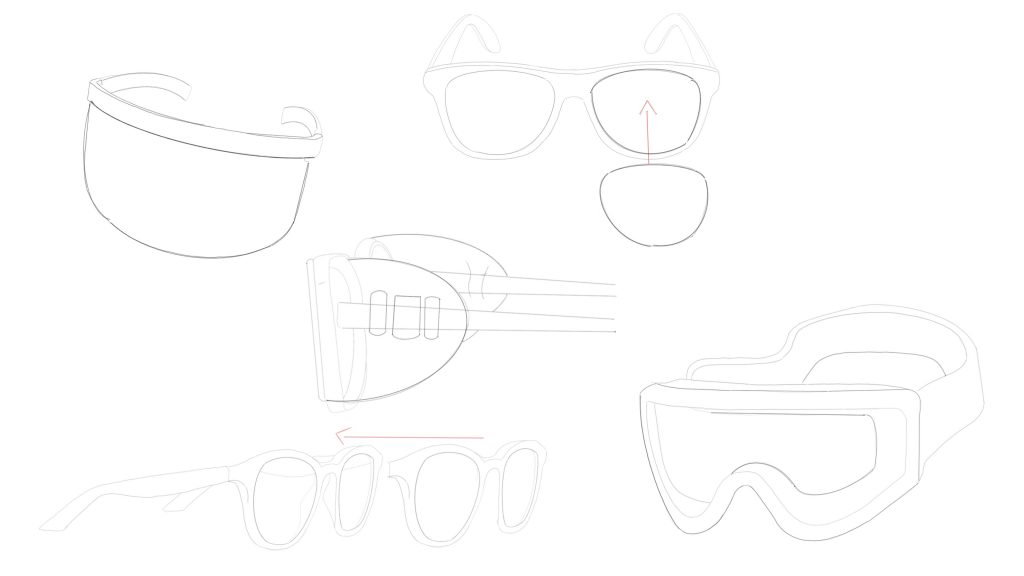
Furthermore, some ideation has been done on existing types of glasses and what elements we can possibly apply to our own product. So for example, the headband(Figure 15) and the soft foam material for closing the eyes of the ski goggles (Figure 16). And using a large glass instead of two separate glasses (Figure 16).
Figure 14
Figure 15
Figure 16
Figure 17
Figure 18
Concept board
With making use of the Co-design session, the research about mechanisms and the ideation we developed 3 total different concepts with different types of glasses and mechanisms. Below the three concepts can be seen with an explanation.
Concept 1
The following concept (Figure 19) is inspired by the glasses which are used at the optician office to give a correct prescription to a person (Appendix A). The idea behind that is to be able to replace the lenses through the slits which are located in the frame. The eyecap is attached using the clicking mechanism described in Appendix A. The main frame has the connectors, and the eyecap has the holes which are used for connecting the frame to it. There are three connectors on the upper part of the glasses and 2 connectors on each side to ensure the secure connection.
Figure 19
Concept 2
Concept 2 (Figure 20) is inspired by the typical cycling glasses (Appendix B: general existing glasses). The cycling glasses consist of 1 large lens instead of two different lenses and are slightly curved in the shape of the human head. By means of a snap fit mechanism it is possible in this design to connect the lens to the frame. In this drawing only one lens is shown, but the intention is that this lens can be placed over another lens. Furthermore, with this concept it is possible to place an eye shield against the glasses using magnets.
Figure 20
Concept 3
Concept 3 (Figure 21) is a more casual design for glasses and has a round shape. These glasses have as an extra feature a strap for around the head. This strap provides stability and ensures that the glasses cannot just fall off the head during activities. In this drawing, the mechanisms for adding the lenses and the eye cap are not clearly visible. For adding the eye cap a sliding mechanism is used (Appendix A: different existing connections) and for the lenses a click connection with a hole on the side of the lenses and a knob on the framework (Figure 22).
Figure 21
Figure 22
user experience
Storage space
According to the requirements, the product should have a case which can store all the components safely. Before designing a case, it was important to have all the components defined and planned out. Thus the following section will contain a summary of the design process for the case for the product.
The case should be suitable for the storage of the main frame, eyecap, extra lens and headband. In addition it should not take too much space in a user’s purse.
Figure 23, ideation for the concept of the storage space
In Figure 23, the ideation for the storage space was made. The ideas considered the case that the co-designer had and variations of it. These variations would require less space in a purse and would be more convenient in use.
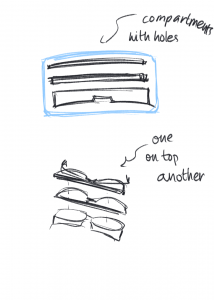
The ideas considered 2 placements of components: either all the components will be displayed in the same compartment or the components can be placed one on top of the other (Figure 24). The placement of components of one on top of the other would lead to the confusion of the location of each separate component, the user will also have to reach to each of them individually. Displaying them all at once would be more user friendly and would not require extra movements.
Figure 24, placement of components in the case.
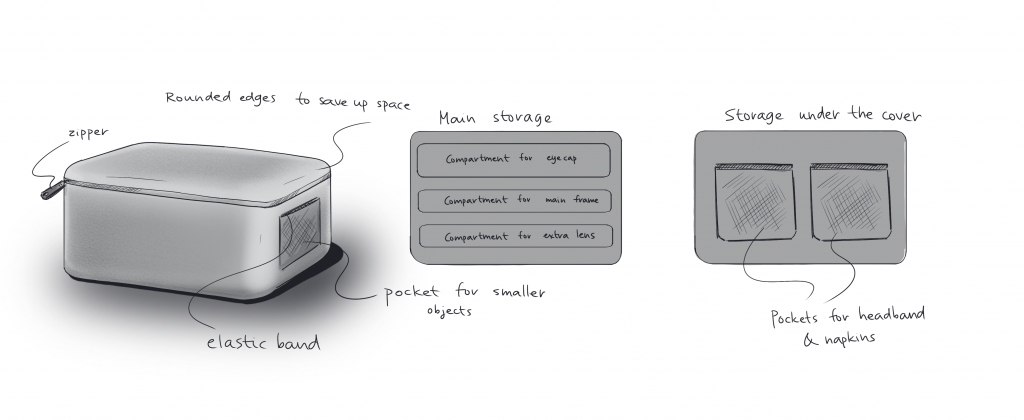
The following concept was developed for the case, it considers the placement of all the competent as well as adds extra storage space for personal belongings and necessities like wipes. (Figure 25)