Project DSU Group 14
The aim of the project Designing for Specific Users was to co-design a product to support persons with a disability in daily life. The co-designer for this project was Thijs (fake name for privacy) who has a developmental delay, low IQ and a disharmonic intelligence profile. He wanted help structuring and planning his day, which is why a planner that fits his wants and needs was designed. Central during the project was the contact between the group of students and the co-designer. This way he took part in nearly every step of the design process. Using participatory design and a human-centred approach, a product was developed to suit Thijs’ needs and wants. This resulted in an easy-to-use planner with an aesthetic based on Thijs’ personal interests, designed to fit Thijs’ preferences.
Context
In this section the context of the current situation will be explored in order to get a better understanding into the needs of the user. Among other things, the daily life, struggles, hobby’s, tasks and disability of the specific user are some of the things that will be looked into. Based on all this the design challenge and the requirements for the rest of the project can be set.
Persona
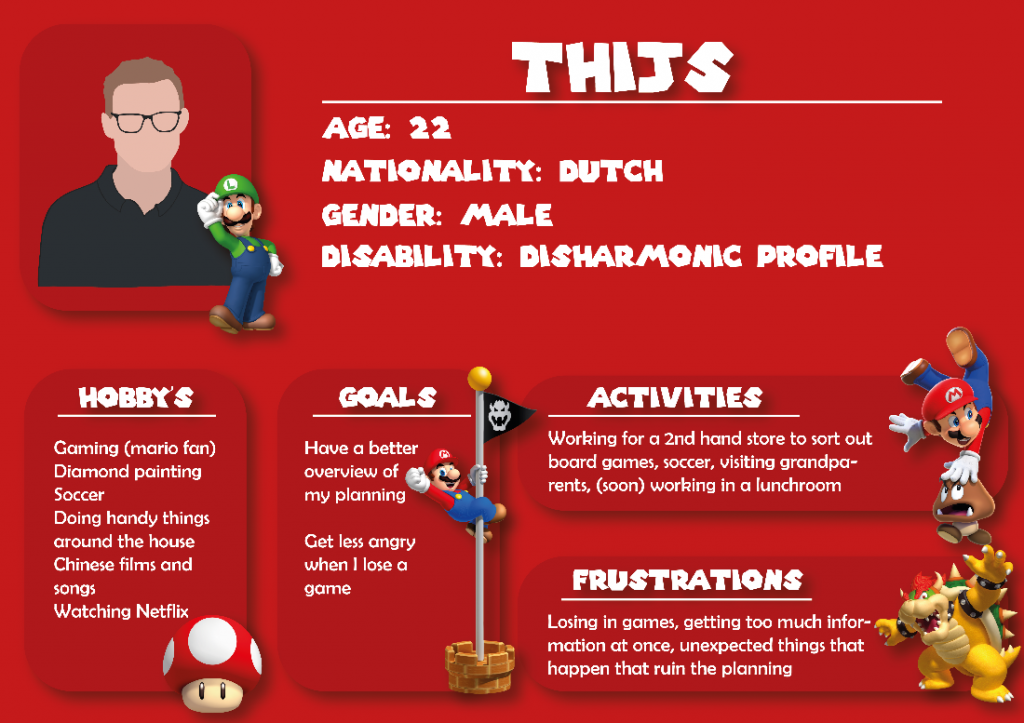
Thijs is a Dutch 22-year-old male who has a developmental delay, low IQ and a disharmonic intelligence profile. Some of his hobbies include gaming (especially Mario games), making diamond paintings and playing soccer. Next to his hobbies, other activities that can be noted are working for a second-hand store to sort out their board games, visiting his grandparents and since recently working in a lunchroom.
His goals are to have a better overview of his planning and to get less angry when he loses a game (mainly board and card games). His main frustrations include losing a game, getting too much information at once and when unexpected things happen, especially ones that ruin his planning. Additionally, he has some difficulties focusing on certain tasks for longer periods of time. However, when he is playing a game on his phone he is so focused that he might ignore important things, like notifications for his medication.
Part of his developmental delay also includes underdeveloped motoric skills. Thijs mainly has difficulties with his fine motoric movements, like writing, but he also uses a tricycle. Although his motoric skills will not be the main focus of this project, they will still be important to take into consideration for the final design.
Thijs has stated that he wants help with planning and structuring his day. He currently only uses a planner he shares with his housemates that includes their important tasks, like the cooking schedule. However, Thijs is interested in having a planner that includes his own, more specific daily tasks. Regular planners do not work for him, since they show too much information at once which he finds overwhelming. Additionally, regular planners are based on writing down tasks, which is something he struggles with. Lastly, he finds regular planners boring and they do not motivate him enough to use them. The idea of using a digital planner was also considered. However, Thijs’ coach mentioned that Thijs gets limited access to his phone and when Thijs was presented with other digital ideas (such as a modified smartwatch), he was not interested in it.
Context Mapping
In order to better understand Thijs’ disability and to be able to construct a product for him, more research was done in the form of a context mapping paper. Below a summary of this paper can be found. The full paper can be accessed here.
This paper first covers the societal trends and the changing perspective on disability. There is currently less stigma associated with people who have a disability and they are being treated with greater respect and compassion than in the past. There are also more and more assistive technologies that increase the functional capabilities of people with disabilities. Then, human-centered design will be discussed, which will be used during the project in order to create a fitting product for the co-designer. Human-centered design is a problem-solving method involving actual people in the development process to produce goods and services that better meet the demands of the target market.
The co-designer of this project is Thijs, who has a developmental delay, low IQ and a disharmonic IQ profile. A disharmonic IQ profile in Thijs’ case means that he scores significantly higher on verbal intelligence than performance intelligence. Thijs has trouble with focusing and planning. Some of his other difficulties involve underdeveloped fine motoric skills. According to research, people with learning disabilities can benefit from electronic planning tools if the tools are tailored to their needs and steps are taken to reduce any negative side effects. According to additional studies, students with learning difficulties used electronic personal devices 50% more frequently than physical ones to arrive on time. There are several digital planners available on the market, but they are all overly complicated and are not tailored to Thijs’ particular requirements.
Lastly, the concept of co-design, also known as participatory design, will be discussed. With the active involvement of end users throughout the whole design process, this design methodology makes sure that the finished product will suit their demands. The usage of tools and processes that might be applicable to this project was discussed along with three pertinent co-design projects.
Storyboard
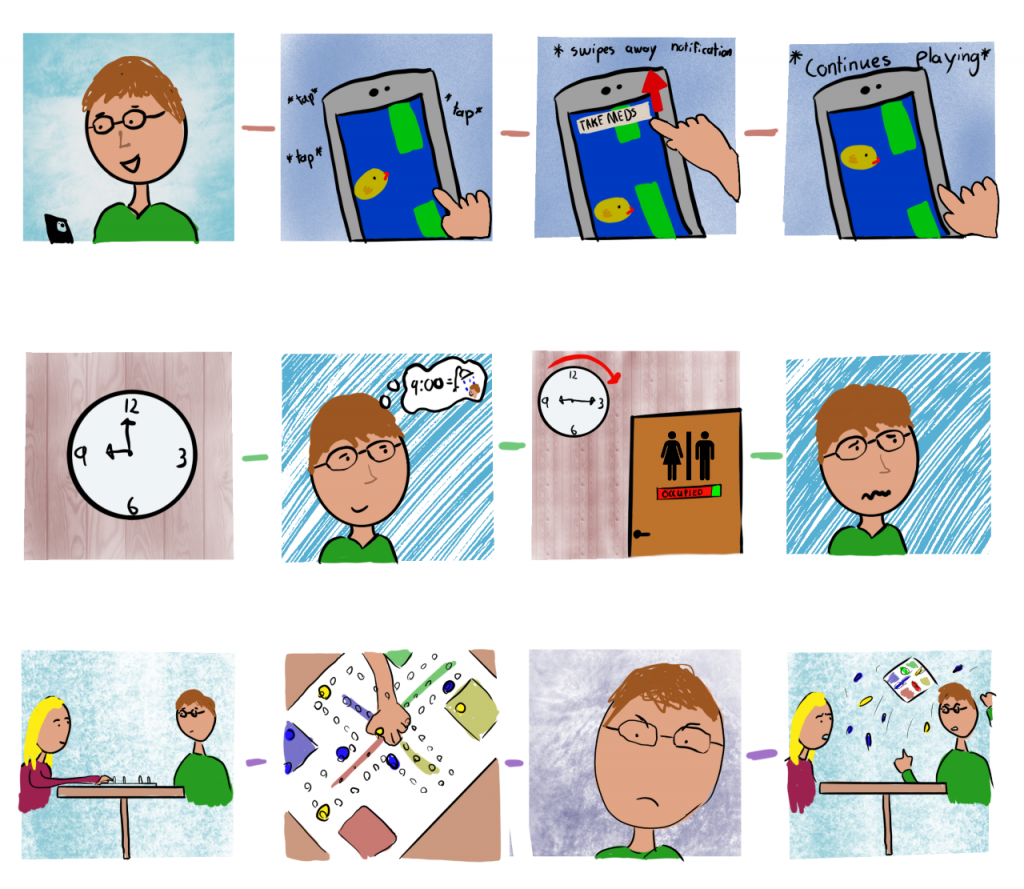
In order to better explain the co-designer and the context that will be designed for, a set of storyboards were made.
The first storyboard shows Thijs playing a game on his phone. He is super focused and enjoys it very much. When an important notification from his phone appears that tells him to take his medication he swipes it away, continues playing the game and forgets about the notification.
The second storyboard shows a scenario in which Thijs’ planning is interrupted. In this case, his housemate is showering longer than they were supposed to, which results in Thijs not being able to shower at his regular time. This interruption makes him stressed and frustrated.
Finally, an example of Thijs getting frustrated due to losing a game is displayed. He is playing a board game and notices he is losing. He gets really angry and out of frustration, he throws the game through the room. This is mostly something that happened in the past. Although Thijs still gets frustrated when losing a game, he has found other ways to deal with this frustration.
Design Challenge
After the research of the context mapping and the first interviews with Thijs, a design challenge was formulated:
Use participatory design to create a product that fits to Thijs’ needs and helps him plan and structure his day.
Based on further research, contact with Thijs and feedback from tutors and other groups, the design challenge was rephrased to be more specific. During this further research essential parts were added, such as displaying one day per page to avoid overwhelming Thijs with too much information and designing to maintain Thijs’ motivation to keep using the planner. The new design challenge is as followed:
Use participatory design to create an easy-to-use day-by-day planning system that fits Thijs’ need to structure his day and motivates him to keep track of his tasks.
Requirements
Based on the research done in the Context phase, a list of requirements was formulated:
- The product should display one day at a time
- The product should allow the co-designer to plan at least one week ahead of time
- Timekeeping on the product should be limited to parts of the day (morning, afternoon and evening)
- The product should allow the co-designer to postpone tasks if they are not completed
- The product should allow the co-designer to keep track of what tasks are finished
- The product should help the co-designer maintain motivation to plan his day
- The product should have a maximum dimension of 360mm x 260mm x 80mm
- The product should be usable with the co-designer’s motoric skills
a. The co-designer should be able to plan tasks without having to write them down
b. The co-designer should be able to open the planner by himself
c. The co-designer should be able to close the planner by himself
d. The co-designer should be able to flip the pages by himself
e. The co-designer should be able to attach the task cards to the planner by himself
f. The co-designer should be able to remove the task cards from the planner by himself
g. The co-designer should be able to put the pen in the penholder by himself
h. The co-designer should be able to remove the pen from the penholder by himself - The co-designer and his coach should be able to change the aesthetics of the planner without help from the design team
A few of these requirements are based on design decisions that were made later in the process, for example some of the specified sub-requirements of requirement 8 and requirement 9. The reasoning behind these requirements will be discussed in the Design Process phase. The requirements based on the Context phase will be explained now.
Since Thijs can get overwhelmed when presented with too much information at once, he wants a planner that only shows one day at a time (requirement 1), instead of for example the whole week at once. However, he does want to be able plan ahead for the whole week (requirement 2). Thijs can get frustrated and stressed if he is not able to complete a task within a given time. This is why the planner will not be time-based, but will instead divide the days up into the morning, afternoon and evening (requirement 3). To relieve stress when a task is not completed on the assigned day, it should be possible to postpone a task to a later day (requirement 4). In order to help Thijs have an overview of his progress with his tasks, it should be possible to keep track of what tasks he has finished (requirement 5). One of the main reasons why Thijs currently does not use any planners is that most regular planners do not motivate him to keep using the planner for a longer period of time. Because of this, the planner that will be designed should help him maintain motivation to use it (requirement 6). Thijs wants to be able to take the planner with him to certain places in his backpack. Because of this, it should fit in his backpack, which has dimensions 360mm x 260mm x 80mm (requirement 7). Lastly, Thijs should be able to use the planner as independently as possible, which means that the planner should be usable with Thijs’ motoric skills (requirement 8). This includes being able to plan tasks without having to write them down (requirement 8a).
Design Process
In this phase, a design for the final product will be made. First, two co-design activities with Thijs will be described, from which clear design preferences were concluded. Then, the process of how the concept was developed will be explained, as well as the reasoning behind design decisions. Lastly, the final design will be shown and explained.
Co-design
1. Card sorting
In this co-design activity, the co-designer was given cards with his daily tasks printed on them and cards with pictures of Mario characters. He was then asked to make associations between his tasks and the characters.
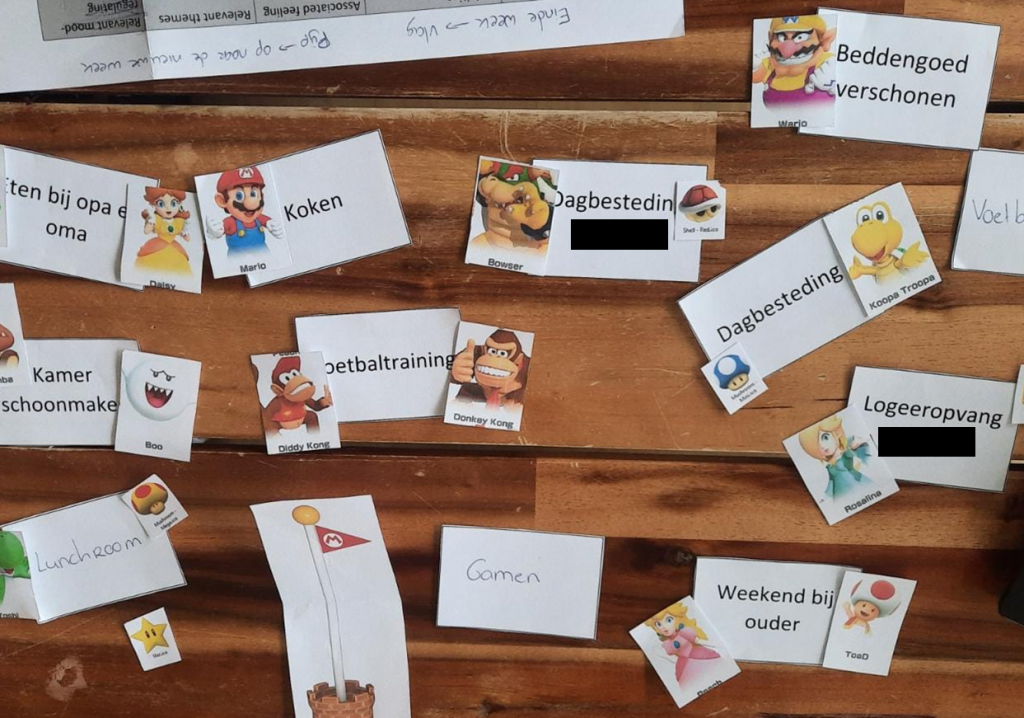
The first goal of this activity was to get to know the co-designer better. Through the associations between tasks and characters and the reasoning behind the associations, the aim was to get more insight into the co-designer’s opinion and thoughts on his tasks. The second goal was to find a way to keep the co-designer motivated to keep using the planner. He thought that by implementing his main interest, he would be more likely to keep using the planner for an extended period of time.
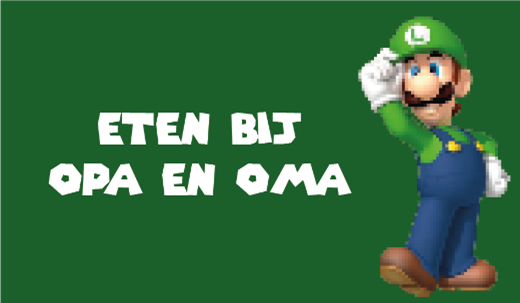
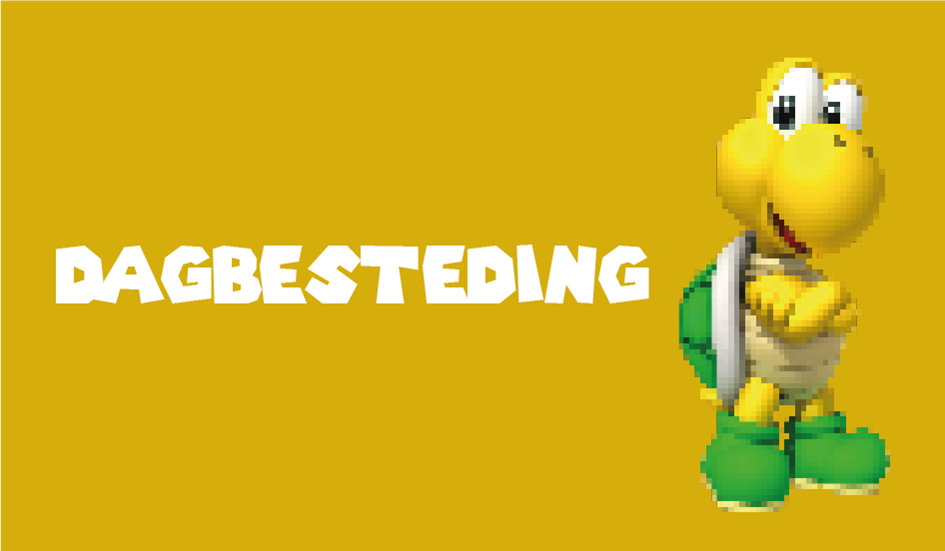
Through the associations between tasks and characters and the co-designer’s reasoning behind them, more insight was gathered into which tasks he enjoys and which ones are stressful or frustrating. The tasks he enjoyed were associated with his favorite characters, like Mario, Luigi and Peach, while frustrating tasks were associated with the rival characters, like Wario and Waluigi.
By doing this exercise also more insight into how the co-designer would like to use the pre-made task cards on the planner was gathered. The original idea was to print out cards with both the task and the associated characters on them. However, the co-designer indicated that he would prefer it if the task cards and the character cards stayed separate, so he would be able to make new associations whenever he wanted. This way, it would be more fun to keep using the planner.
This co-design activity also gave more insight into the best way to co-design with the co-designer and how to get the most feedback from him. At first, all the cards, both the task cards and the character cards, were placed on the table. When the co-designer was asked to start making associations, he expressed that he was overwhelmed by all the options and did not know where to start. Because of this, instead only one task card at a time was shown, while still having all the character cards on the table. This way the co-designer could focus on one task association at a time. Through earlier conversations, as well as this activity, it was realized that the co-designer finds it difficult to give feedback and ideas when he is presented with too many options at once or if the question that is being asked is too open. This was kept in mind when preparing for the second co-design session.
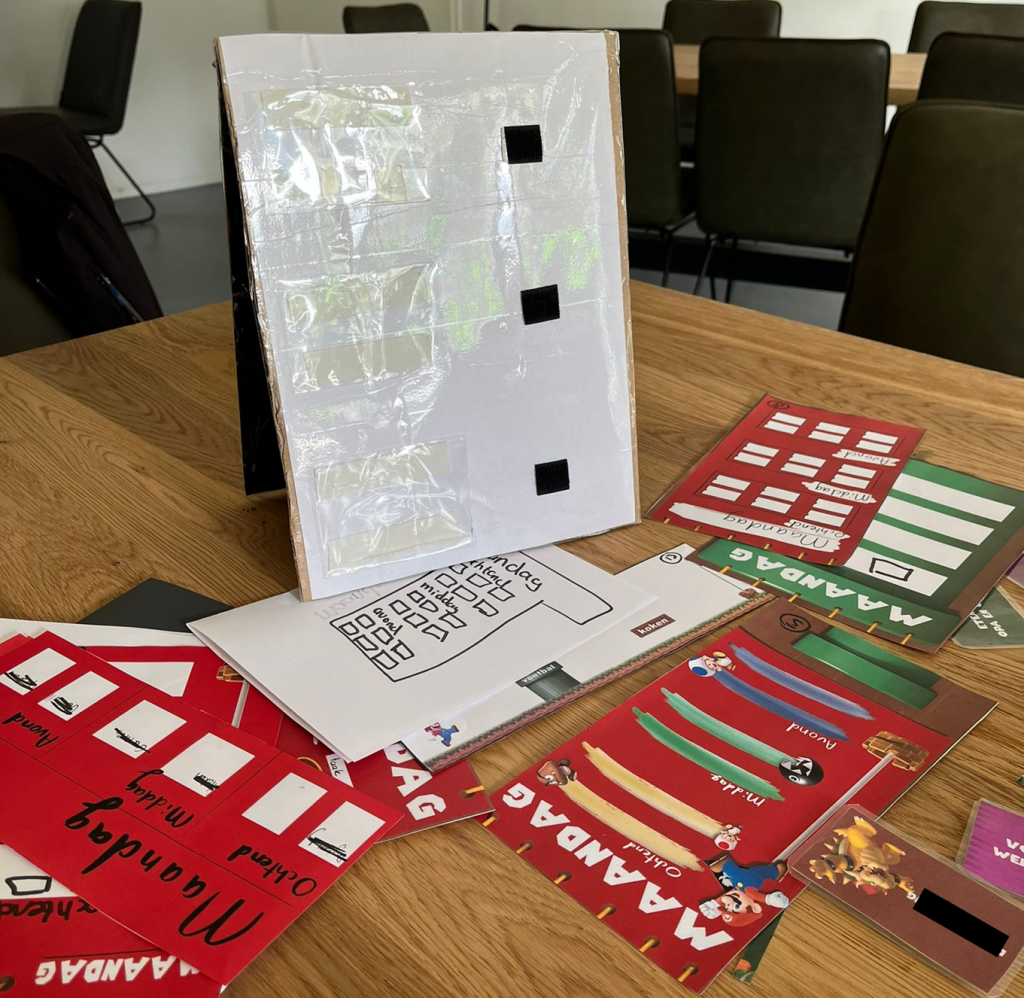
2. Prototype testing
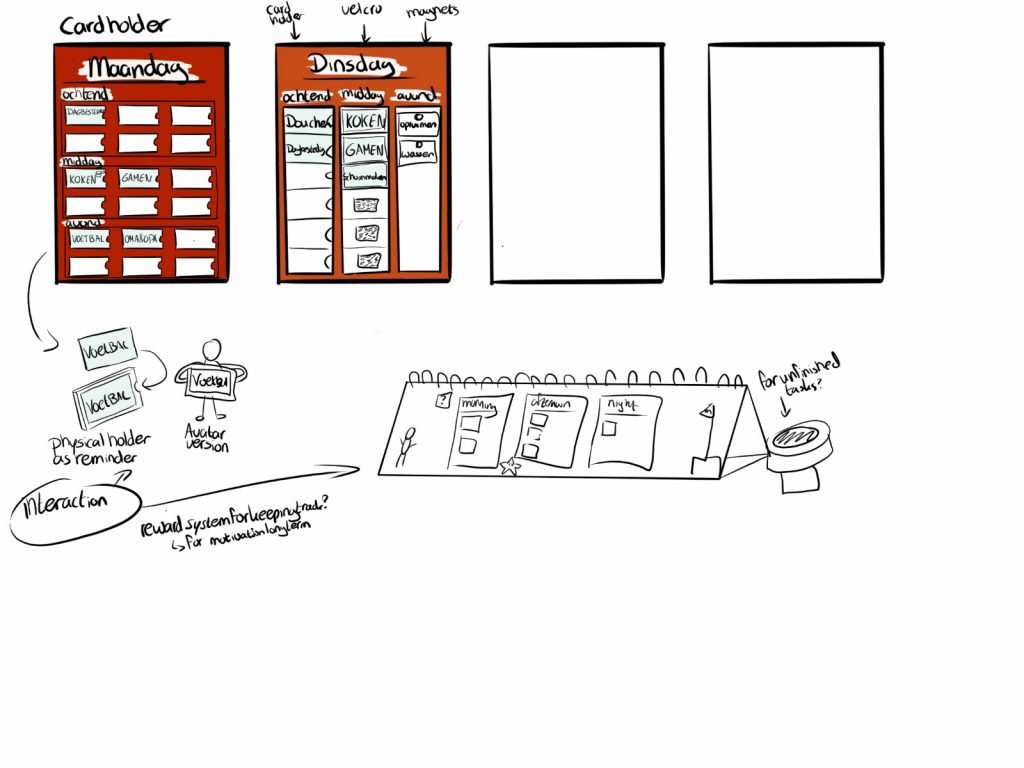
During this co-design activity, the co-designer evaluated varying prototypes of different elements of the planner. First, he was presented with a prototype on which he could test out different attachment methods for the cards. The used attachment methods were velcro and plastic cardholders. Then, he was shown different possible layouts for the planner. He was shown two layouts at a time and was then asked which one he preferred and why. After this, the least preferred layout was removed and a new one was presented next to the previously preferred one. By showing only two layouts at a time, the co-designer was able to give detailed feedback, while not getting overwhelmed or distracted by too many options.

The first goal of this activity was to figure out what attachment method for the cards would work best for the co-designer. By letting him test out different methods, it could be seen what was and was not possible regarding his motoric skills. The second goal was to figure out what kind of layout the co-designer preferred. By eliminating layouts until only one was left, the aim was to figure out what general layout he would prefer. Additionally, detailed feedback about each possible layout was needed, so layouts could be combined or adapted to create the most suitable one for the co-designer.
Through testing different methods, it was concluded that velcro is the most suitable option for attaching the cards to the planner. While the co-designer had no problems using this method, he struggled with sliding the cards into the plastic card holders. Because of this, velcro will be used in our final design.
By evaluating different possible layouts with the co-designer it was concluded that elements of a few layouts should be combined. The preferred elements of the co-designer are:
- Vertically oriented planner
- Tasks should be ordered from top to bottom in chronological order
- Clear division between parts of the day (morning, afternoon, evening), both by text and colour
- There should be a square next to each task that can be used to cross tasks off
- To the right of each task should be a space for the associated Mario characters
- The green pipe should be used as the background of the layout
Additionally, the co-designer came up with the idea of having something to store his cards in. After brainstorming about possible options, he mentioned he liked the idea of having a small container in the shape of the green pipe from the Mario games.
Concept Development
Based on the Context phase and the co-design sessions, the concept was developed. Below the whole process, from initial ideas to final decisions will be discussed.
Based on the first conversations with Thijs, it was clear that he wanted a planner that incorporated his interest in Mario, since this would make it more fun for him to use the planner. Initial ideas for a Mario-themed planner included making a 3D planner, for example one that looked like a Mario level. The more tasks completed, the further a 3D Mario character would be moved through the level, until it would reach the end of the level when all the tasks for that day were completed. However, when presenting these ideas to Thijs, it became clear that he preferred a simple 2D planner.
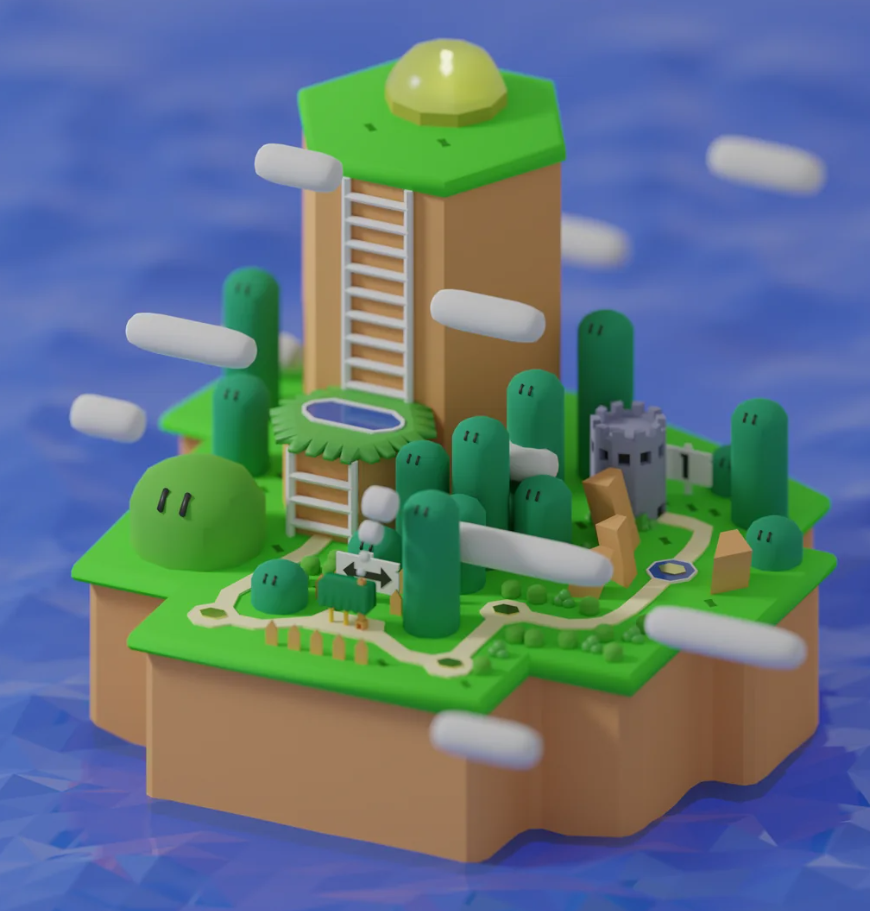
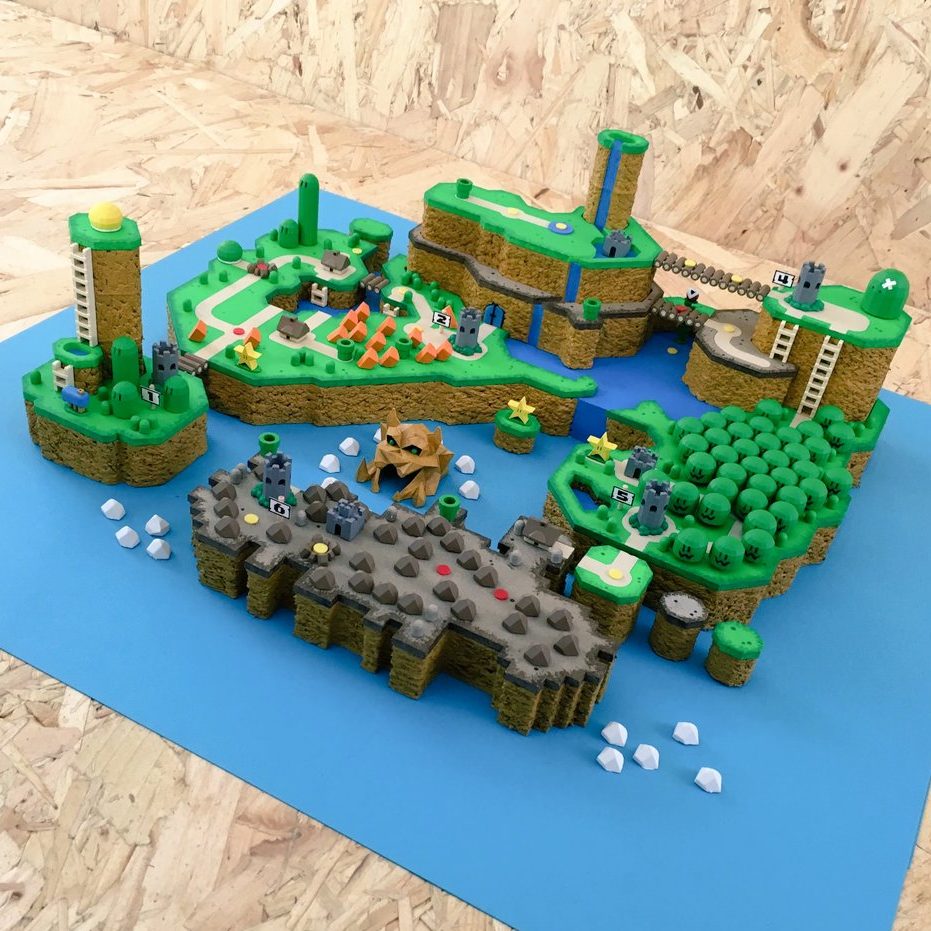
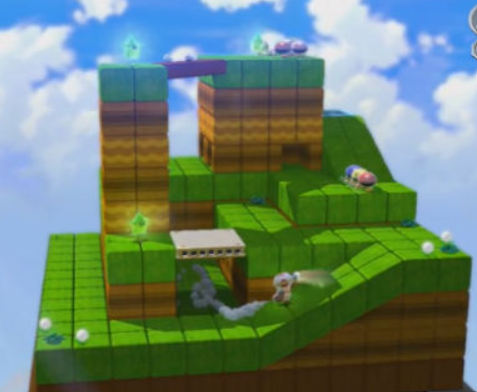
Inspiration for 3D mario planners [1], [2], [3]
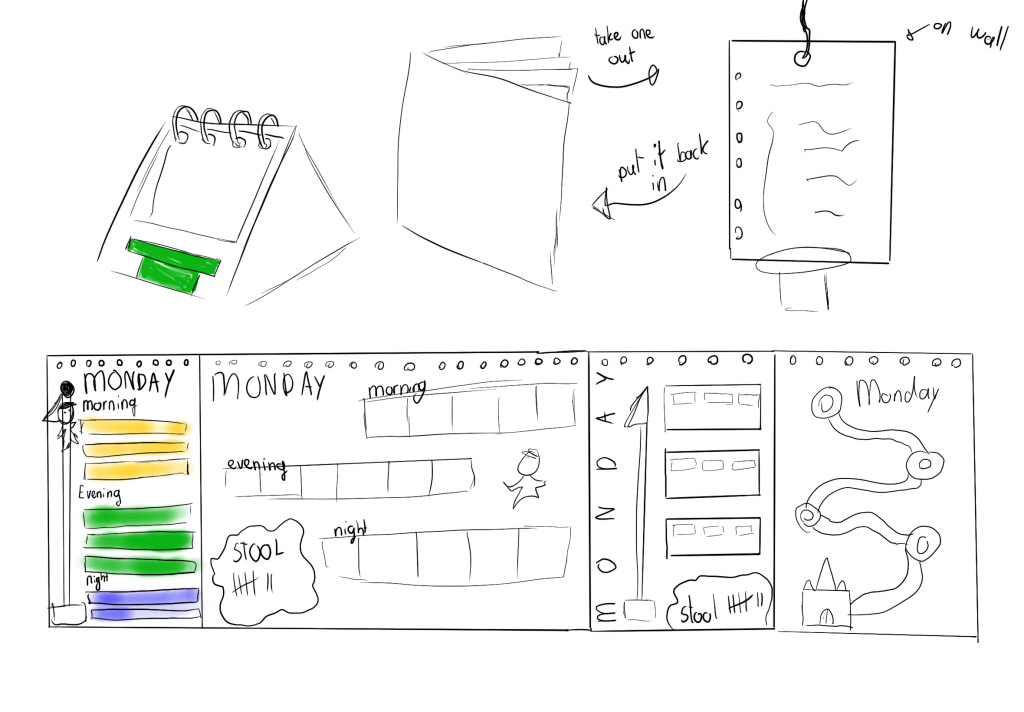
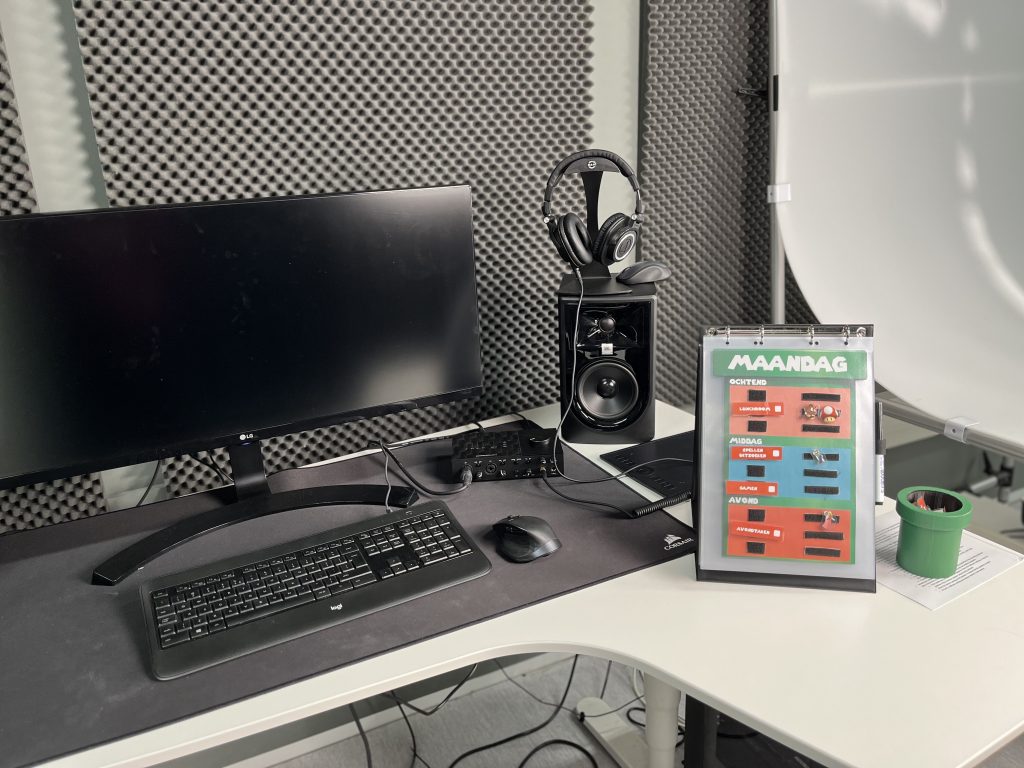
Based on this feedback, a lot of ideation was done on possible shapes and layouts for a 2D planner. In order to fulfill Thijs’ requirement of only showing one day at a time, it was decided to make a planner with seven separate pages, each one corresponding to a day of the week. When asking Thijs if he wanted a vertically or horizontally oriented planner, he said he would prefer a vertical one, since this gives him a better overview than a horizontally oriented planner. Together with Thijs, it was then also decided that the planner should be a ring binder that can stand upright in a triangle shape. This would allow him to easily flip to the next page and allows him to clearly display his daily tasks. When closed, the planner should still fit in his backpack.
In the first co-design session, the idea of having pre-made task cards for the planner was discussed with Thijs. He liked this idea, since it would not require him to write in order to use the planner. As mentioned before in Co-design, this co-design session was used to better understand Thijs by letting him make associations between his standard tasks and the Mario characters he associates with them. Some of the task cards that were based on these associations can be seen below.


However, during later meetings, Thijs mentioned that he would like to have separate cards for his tasks and the characters. This way, he would be able to make new associations every week, which would make using the planner more interesting and fun for him.
In order to be able to use the cards on the planner, they have to be attached to the pages in some way. Multiple different methods were thought of, like velcro, magnets and plastic card holders. One of the main concerns regarding magnets was that they can still slide over each other, and might thus not keep the cards in place properly when transporting the planner. Because of this, magnets were not taken into further consideration. The choice between velcro and plastic card holders was based on what would work best with Thijs’ motoric skills. Because of this, prototypes of both attachment methods were brought to the second co-design session, so he could test both of them. As discussed in Co-design, velcro worked best for him and was chosen as the final attachment method for the cards.
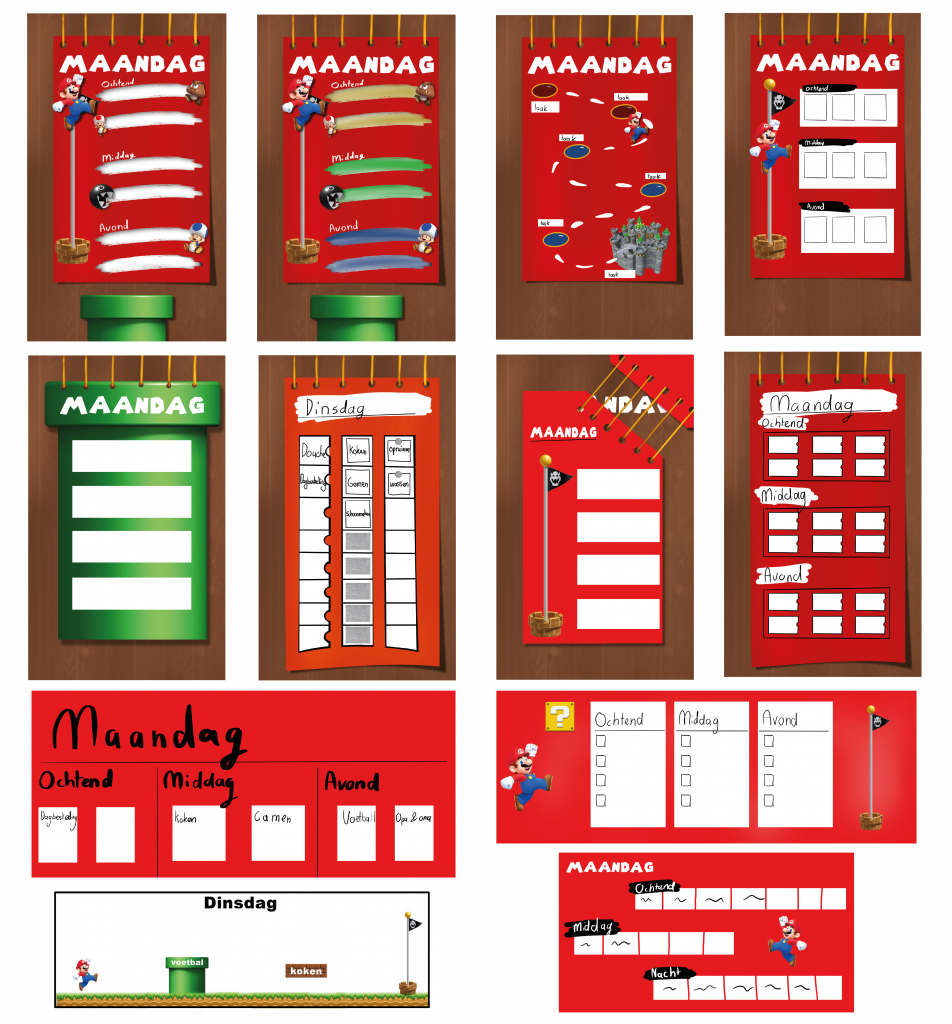
During the second co-design session Thijs was also presented with a lot of different layouts in order to get a clear idea of what works best for him. There were different shapes of layouts, for example, rectangular or shaped like the green pipe. Some of these layouts had the tasks ordered chronologically from top to bottom, while others were also (partially) horizontally ordered. There were also different ways of keeping track of what tasks are finished. One of the ideas was to have Mario slide down the end-of-level flag from the game if a task was finished. Other ideas included having Mario move through a level from left to right or having Mario hop from task to task. Lastly, some layouts had no relation to time at all, while some included only a division of different parts of the day.
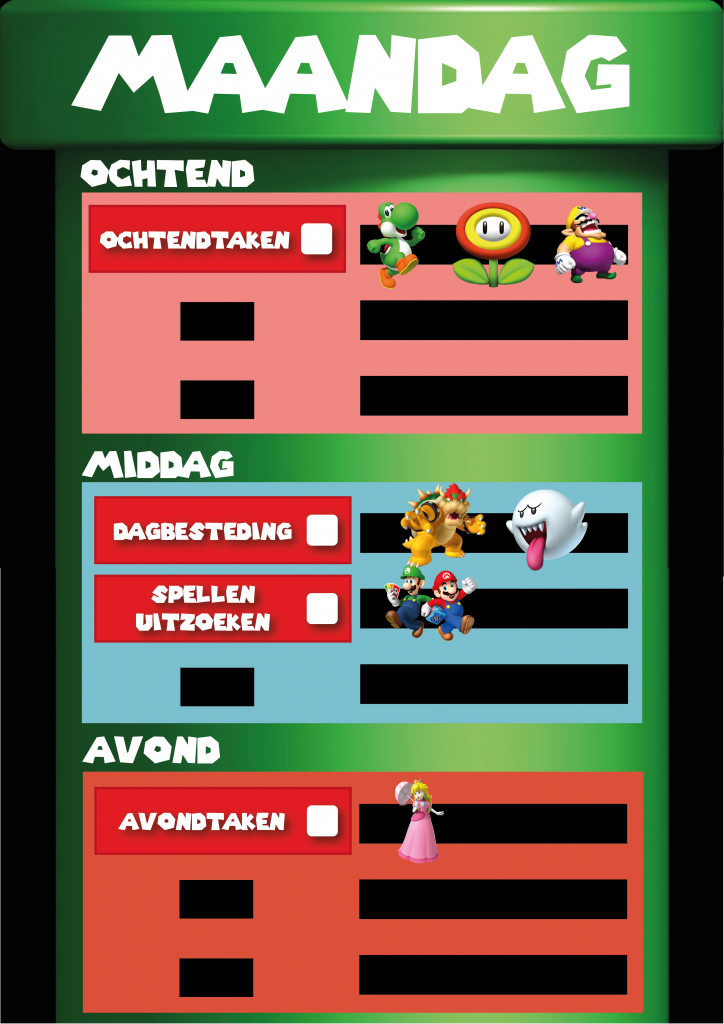
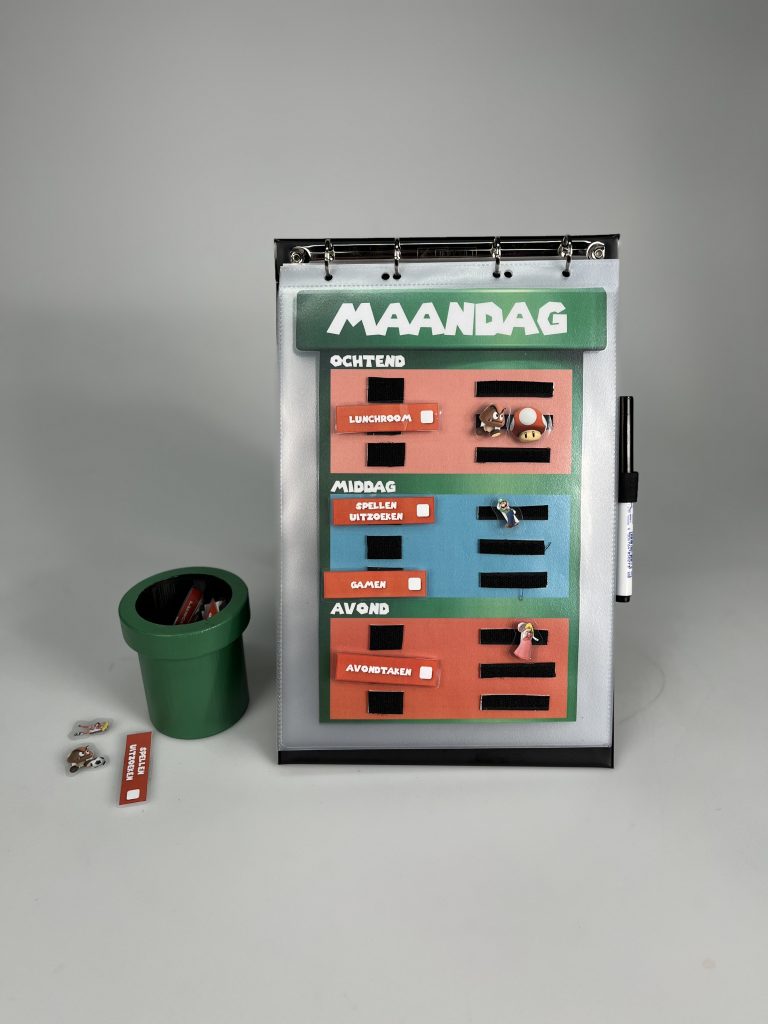
As already mentioned in Co-design, it was concluded that Thijs prefers a layout with the green pipe as the background on which the tasks are chronologically ordered from top to bottom. He wants the day to be divided by the parts of the day (morning, afternoon and evening) and wants a clear division between these sections on the planner, both by text and color. Lastly, he wants boxes on his task cards in which he can cross off the task if it is finished. To cross of a task a whiteboard marker is used because it is easy to erase it and the cards can be used over and over. A penholder was made with some velco on the side of the planner, so that he can easily store a pen. Additionally, this pen holder can hold different sizes of pens since the size of the velcro holder adapted. There is also a space next to the task cards where he can place the associated characters.
After these things were decided, the layout was almost finalized. The only decision that still had to be made was what colors to use for which part of the day. The following options were sent to Thijs:
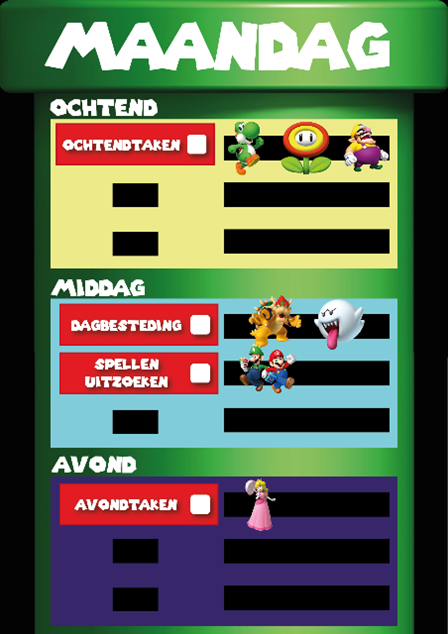
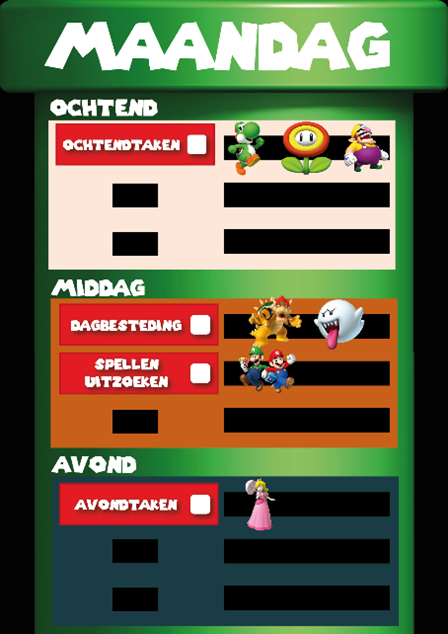
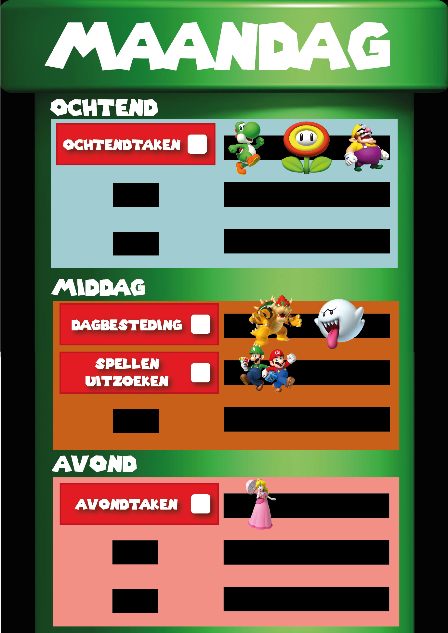
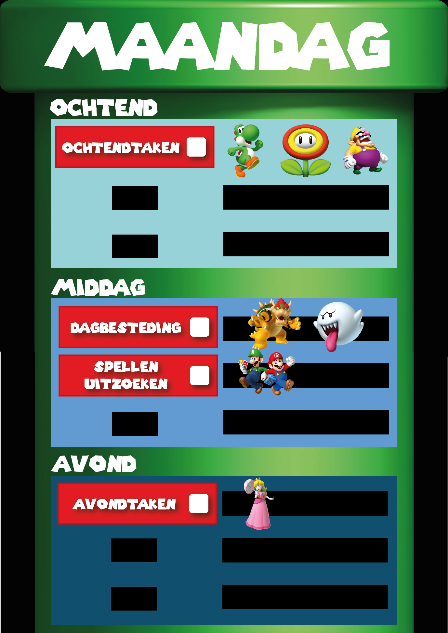
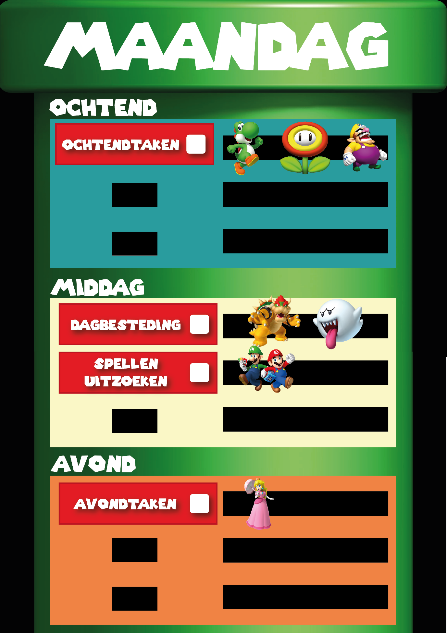
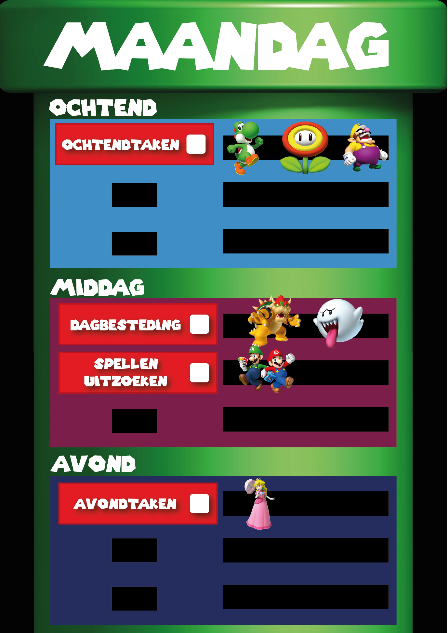
The resulting reply was that he wanted to have the colors light blue, light pink and darker orange. To create unity between the three colors, the orange was changed slightly to a more pastel color. Furthermore, the order of the colors has been switched up to a more logical position, inspired by the colors of the sky during the day. The pink resonates the most with the sunrise in the morning, the blue works best with the afternoon and the orange represents the sunset in the evening. The final layout can be seen below.
During feedback sessions of this project, some tutors and experts said they thought it would be useful if the cards and/or the theme of the planner was adaptable. This is mainly because Thijs’ interests might change later and what is motivating for him right now, might not be motivating for him in a few years. Because of this, ways to make the planner scalable were worked out. There is also a possibility that Thijs will have new tasks in the future. The new activity cards just have to be printed, laminated and attached to a piece of velcro. To make this as simple as possible for them, a template and instructions were created to help them make new task cards.
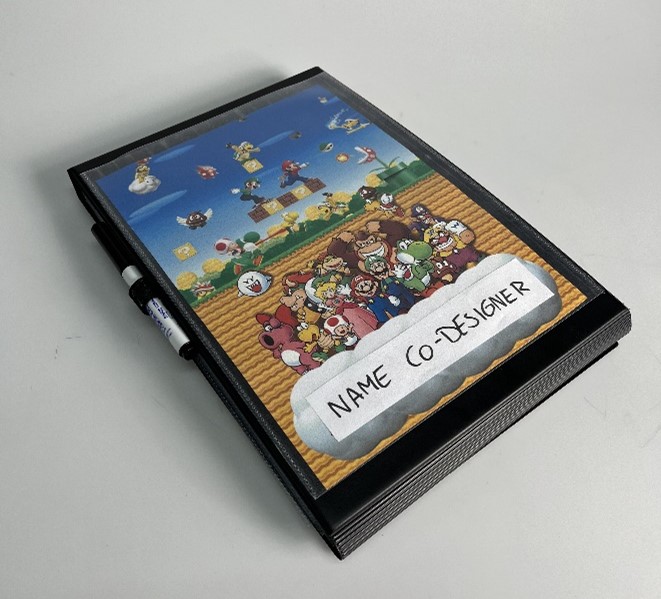
A way that Thijs can also scale the planner is with the front cover. This is a clear insert cover where he can put in a picture that can easily be printed on A4 paper. In this way, Thijs can keep the binder updated with his current hobbies or interests. For now, the front cover is a Mario-themed picture with his name on it, but he can easily change it in the future if he would like to.
Thijs can also change the look of the inside of the planner. The Mario pipe-shaped pages can be changed for a layout with another background image. To do this, another document is made with a basic layout that can easily be changed and an explanation of how to do this.
With all these customizing options the co-designer and his coach can change the look of the planner in case the interests of the co-designer might change.
During the design process, a lot of additional ideas for the planner were considered. These ideas and the reasoning behind why they were not included in the final design will be explained now.
The first additional idea was to include some mood-regulating activities in the planner. Since Thijs’ current main struggle besides planning is keeping his emotions under control. He can for example get very stressed and overwhelmed when presented with too much information at once and he can get mad when he loses a game. Although he has made a lot of improvement, he mentioned that this is still something he struggles with. Because of this, the idea of implementing mood-regulating activities was briefly discussed in the beginning of the project. However, when asking Thijs if he would be interested in this, he said that those activities are not for him, which is why this idea was not further explored.
The second idea was based on an idea of Thijs’ coach who thought it would be beneficial to also use the planner to keep track of some of Thijs’ medical issues. Some ideation was done on how to implement this with the layout. However, during a later meeting Thijs indicated he was not comfortable with including this in the final design, so the concept was disregarded.
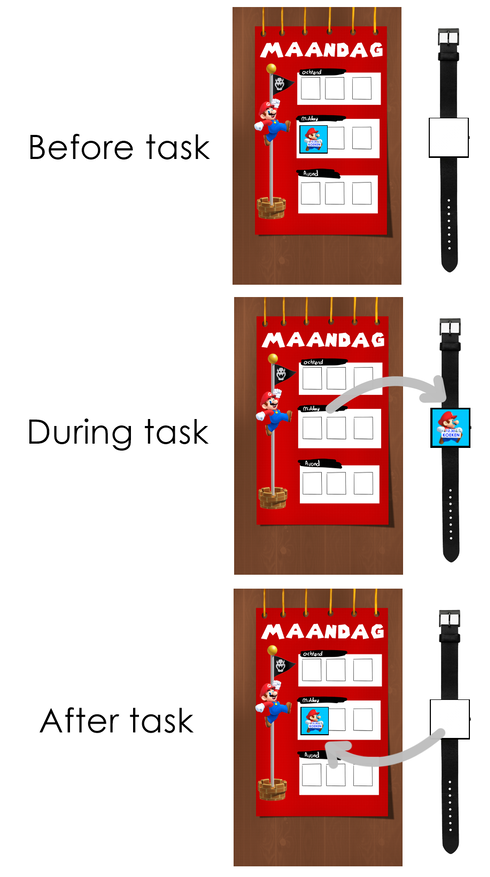
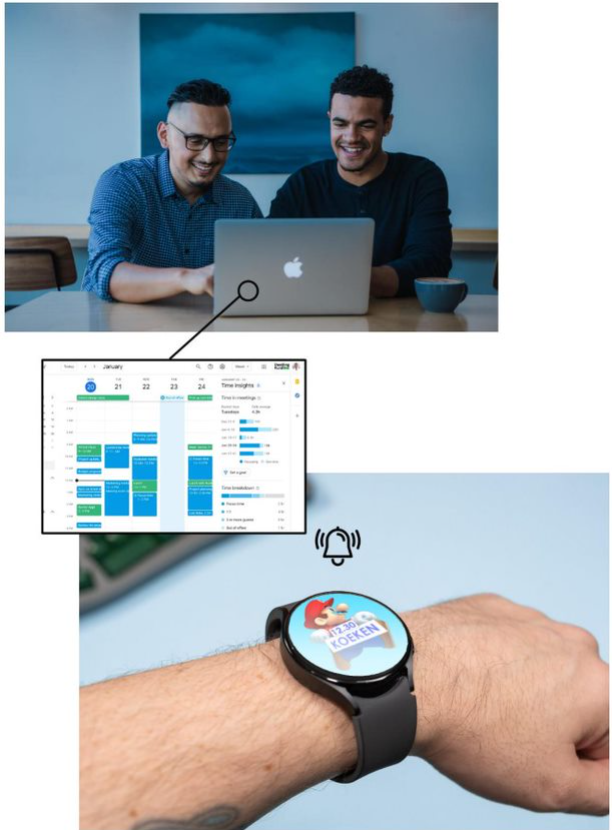
The last additional idea was a reminder system for which task Thijs was doing. He mentioned that it sometimes happens that he is working on a certain task and he gets interrupted to do something else. If he then later wants to get back to his previous task, he has often forgotten what he was doing before. Because of this, ideation was done on different reminder systems, including an electronic avatar or smart watch connected to his planner and ways to take the task card with him. However, when later discussing the issue with him again it became clear that the main thing he forgets is what specific part of his task he was working on, not what task itself. Since it would be very difficult to make a reminder system for this and since Thijs also said he would probably forget to take the reminder system with him, it was decided to not further include this idea.
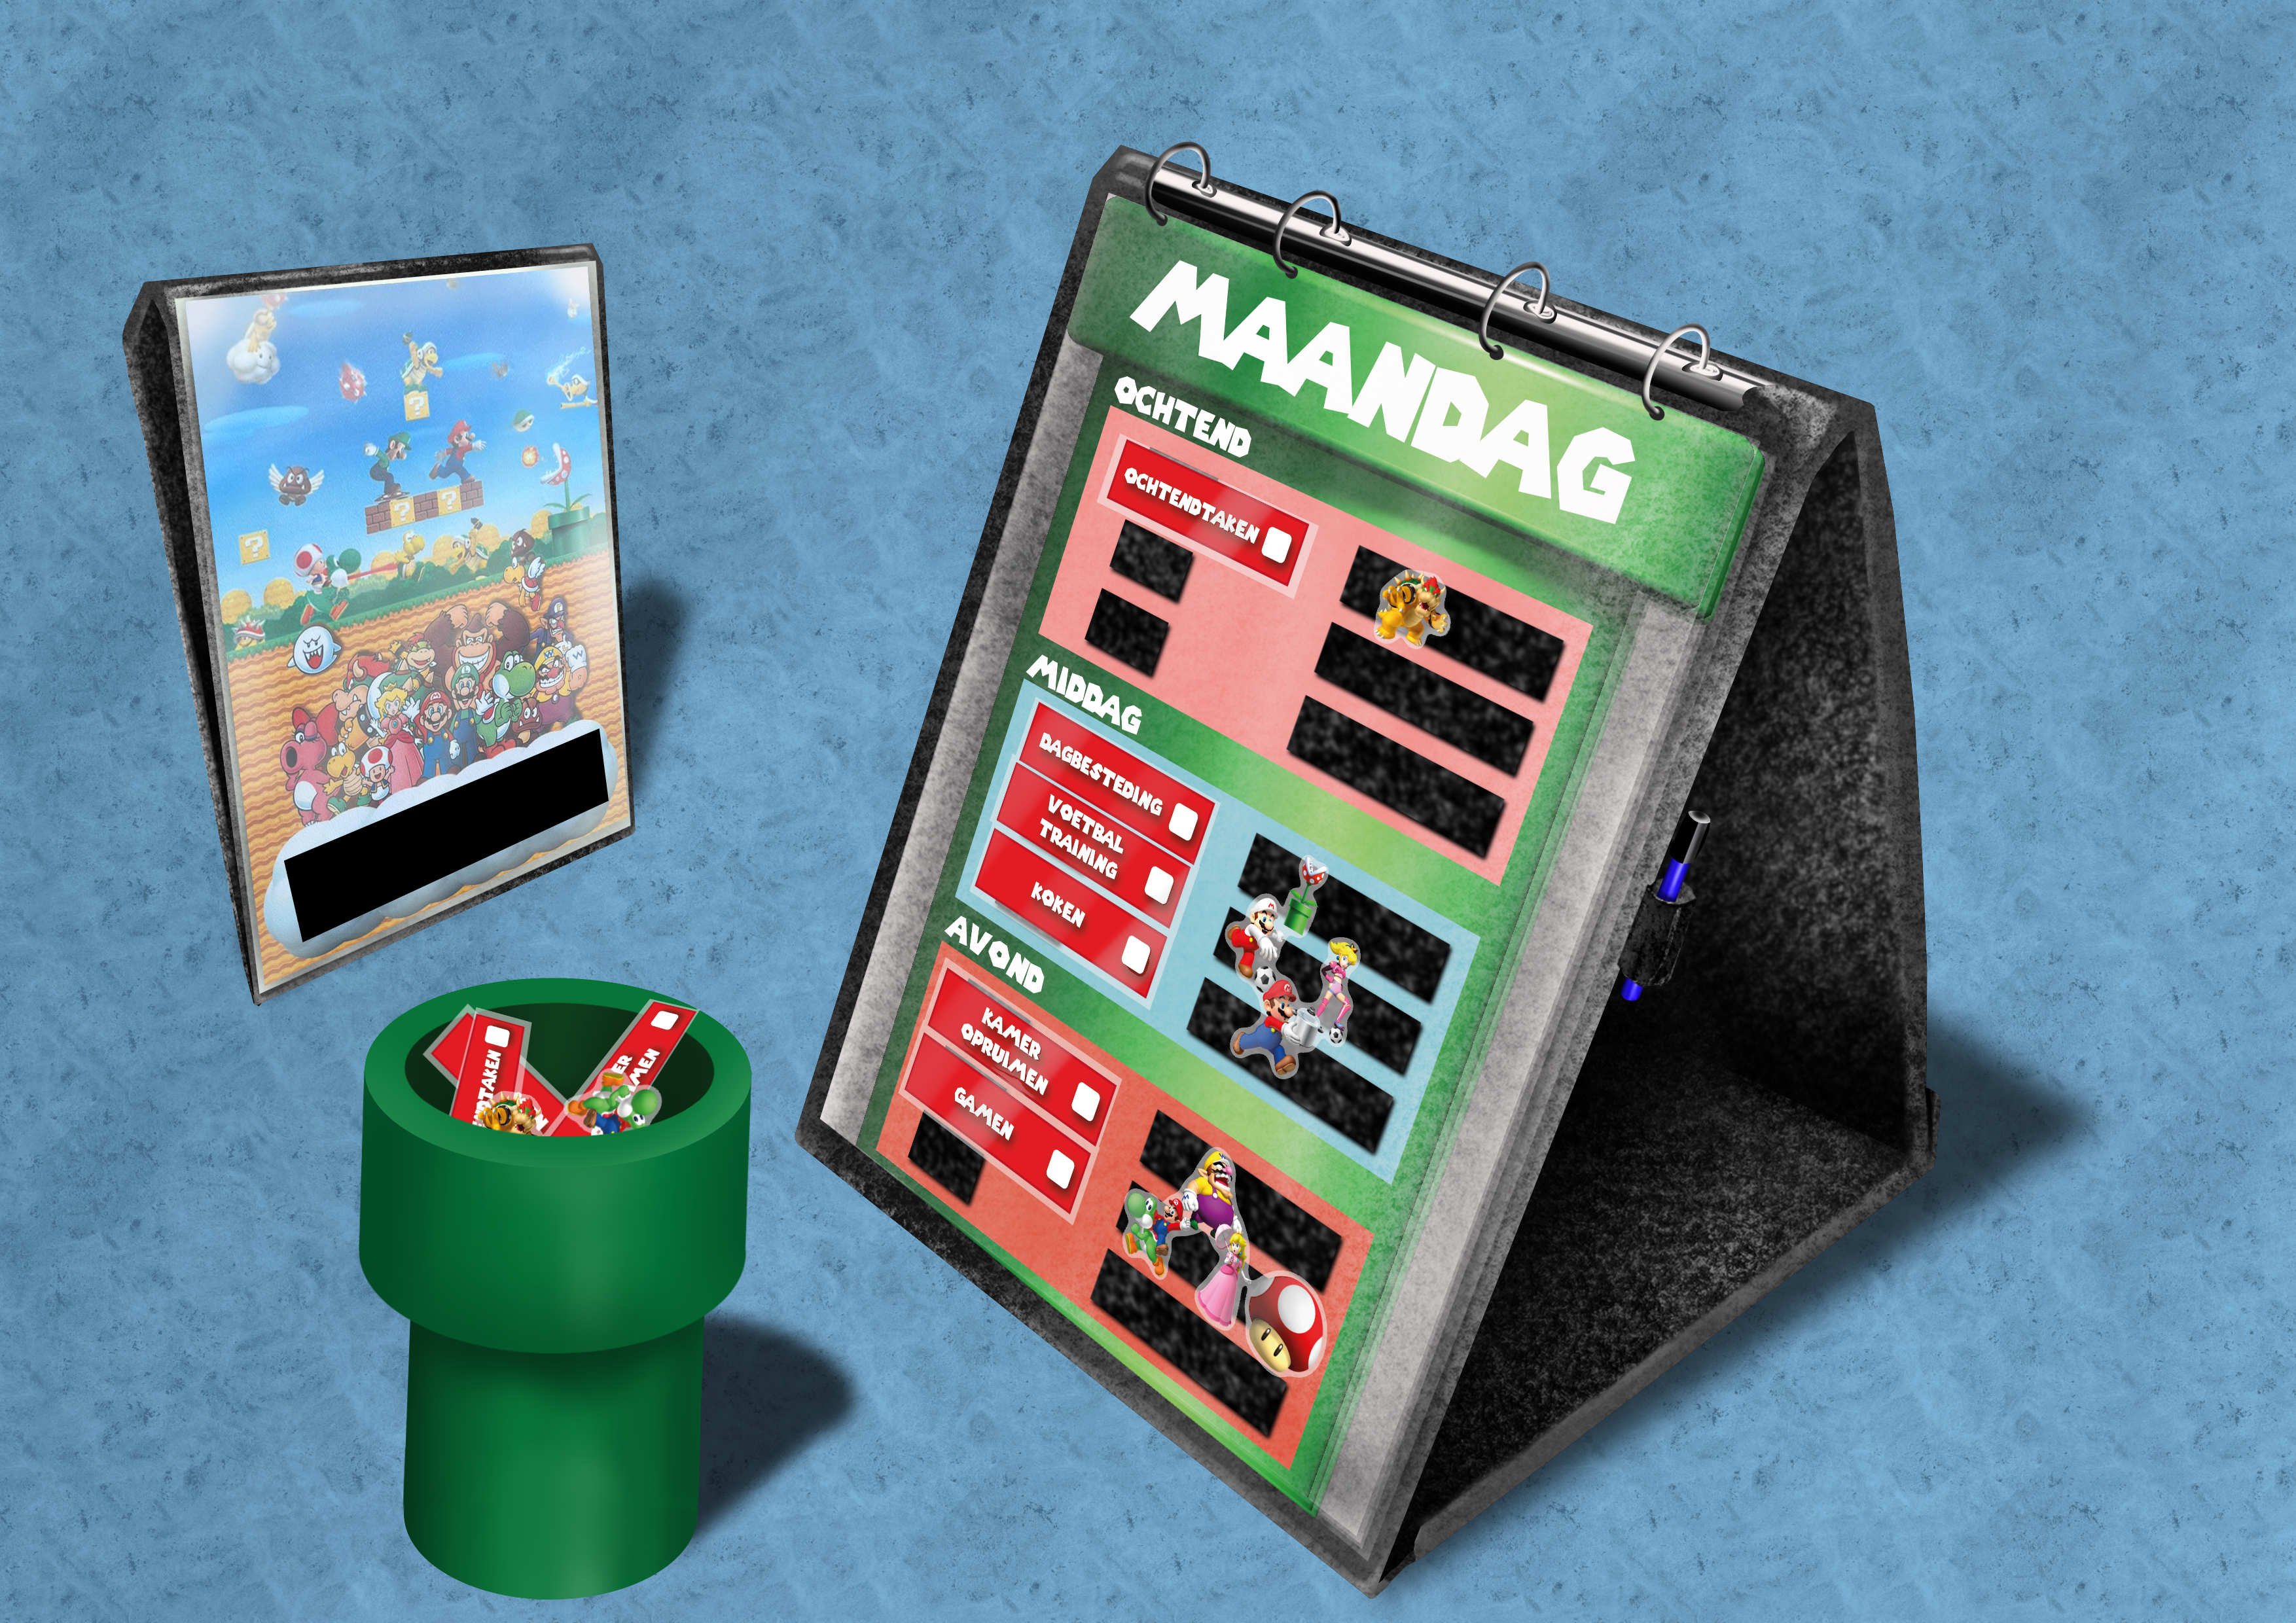
Final Design
After the co-design sessions and developing the concept, the final design was made. The basis of the planner is an A4-sized ring binder. On the front of the planner is a clear insert cover attached, in which a Mario-themed front page with the name of the co-designer is inserted. When opened, the ring binder can stand upright in a triangular shape. The planner has seven pages, one for each day of the week. The pages are also slid into clear insert covers. The pages have the green pipe from Mario as the background and are divided into three different parts of the day. On the page, there is space to order task and character cards chronologically from top to bottom. The cards can be attached to the planner using velcro. The velcro is attached to the cards and to the outside of the clear insert covers. On the task cards is a box that can be used to cross off what tasks have been finished. Since all the cards are laminated, this can be done using a whiteboard marker, which can be wiped off later. On the side of the planner, a penholder for the marker is attached. It is made out of velcro, such that it can be easily adjusted to different marker thicknesses in case a different pen will be used in the future. The cards can be stored in a container shaped like the green pipe from Mario.
These cards have been made based on how the co-designers week looks like on a regular basis. For now these cards are enough, but in the future there might be new tasks. Therefore, Thijs and his coach will be provided with a template and explanation for making these attributes. They will also be provided with a template and explanation for making a layout in another style. Lastly, it is possible to replace the front page with a new picture.

User Interaction
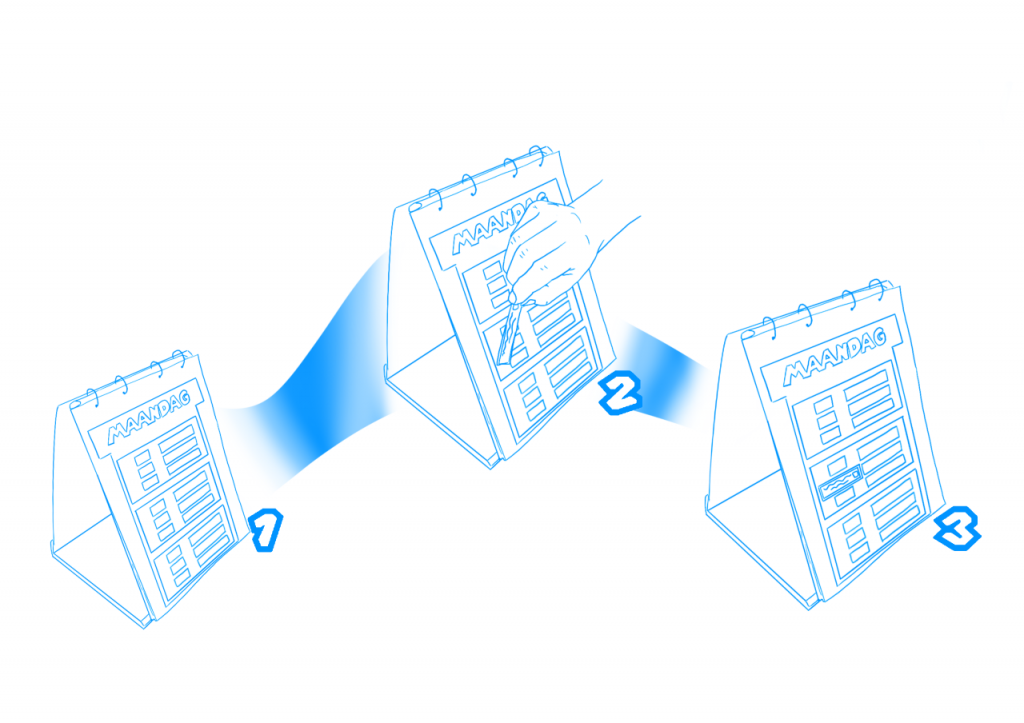
In order to clearly communicate the usage of the product the some interaction sketches have been made.
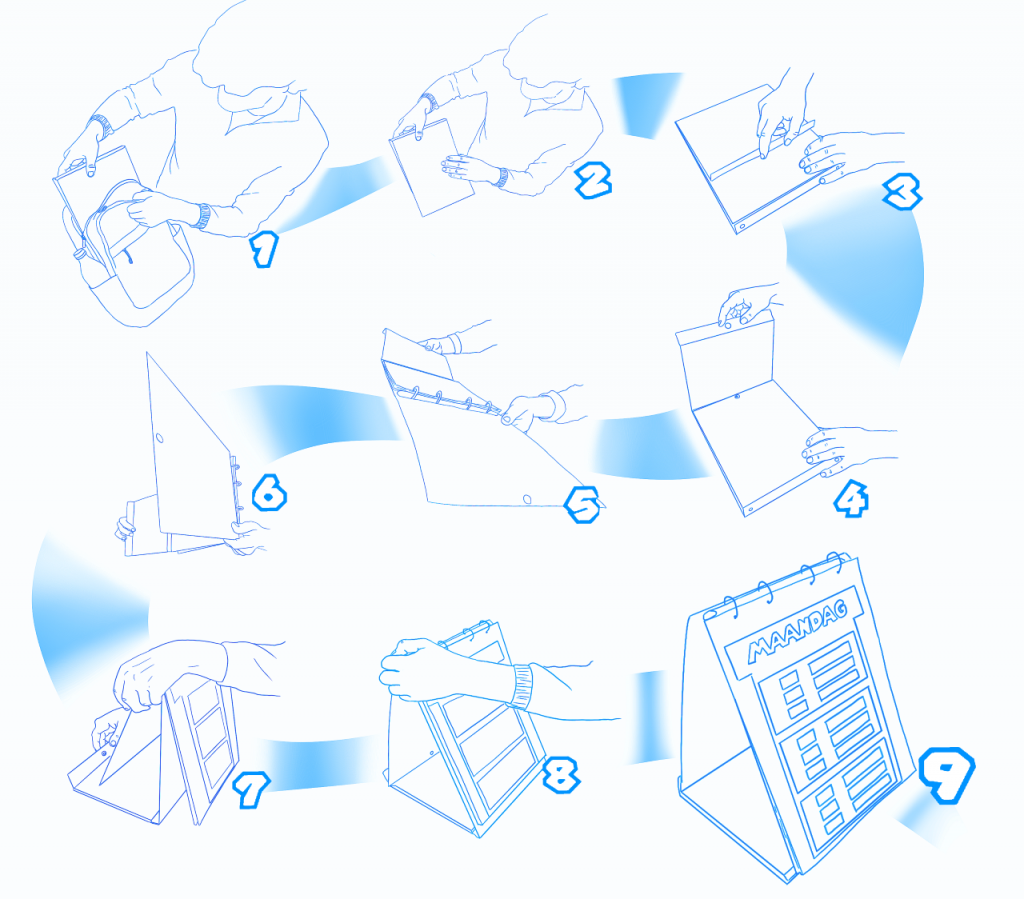
The first storyboard shows how the user can set up the planner. In step 1, the user grabs the planner out of his backpack and after that it is shown how to make the planner stand in a practical way.
The second storyboard shows how to add the task and characters cards to the planner. The back of the card with the velcro needs to stick to the front of the page with velcro.
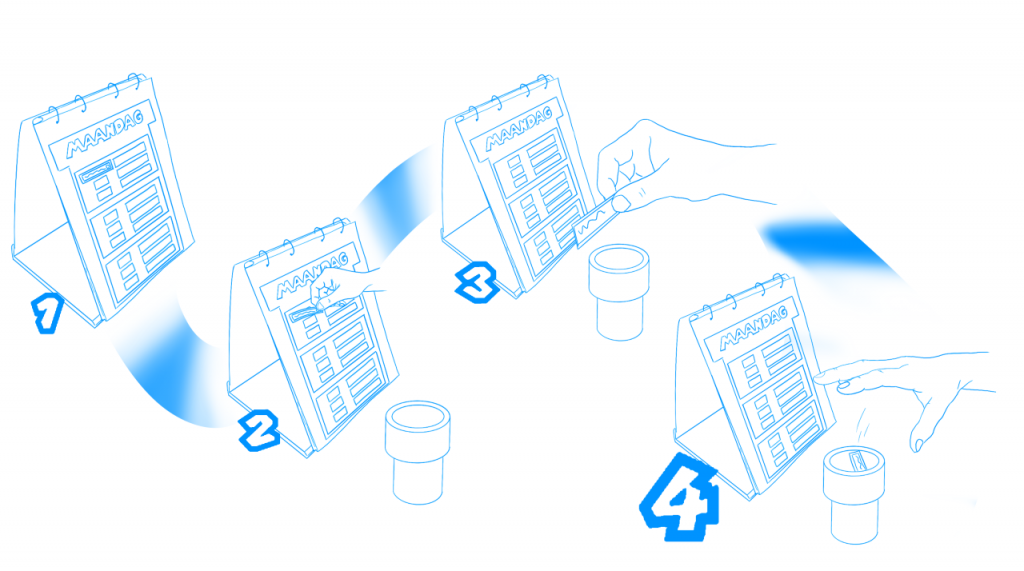
The next storyboard shows that after use, the user can take the cards off the planner and put them in the designated container.
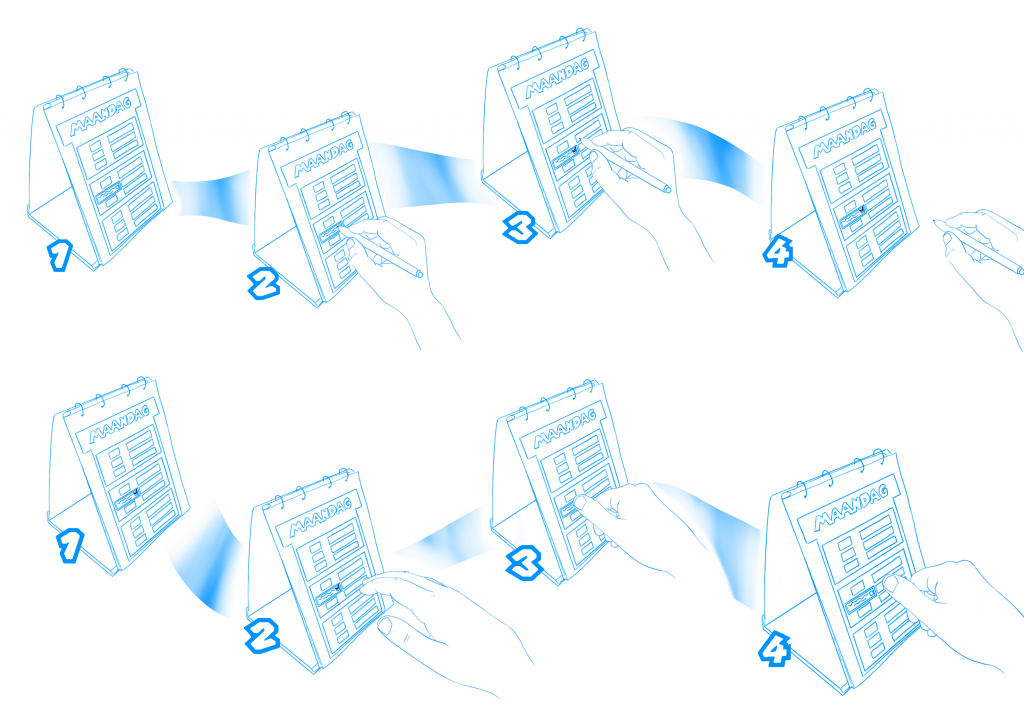
The following storyboard shows how to cross off tasks using a whiteboard marker. It also shows that the marker can be easily wiped off the cards.
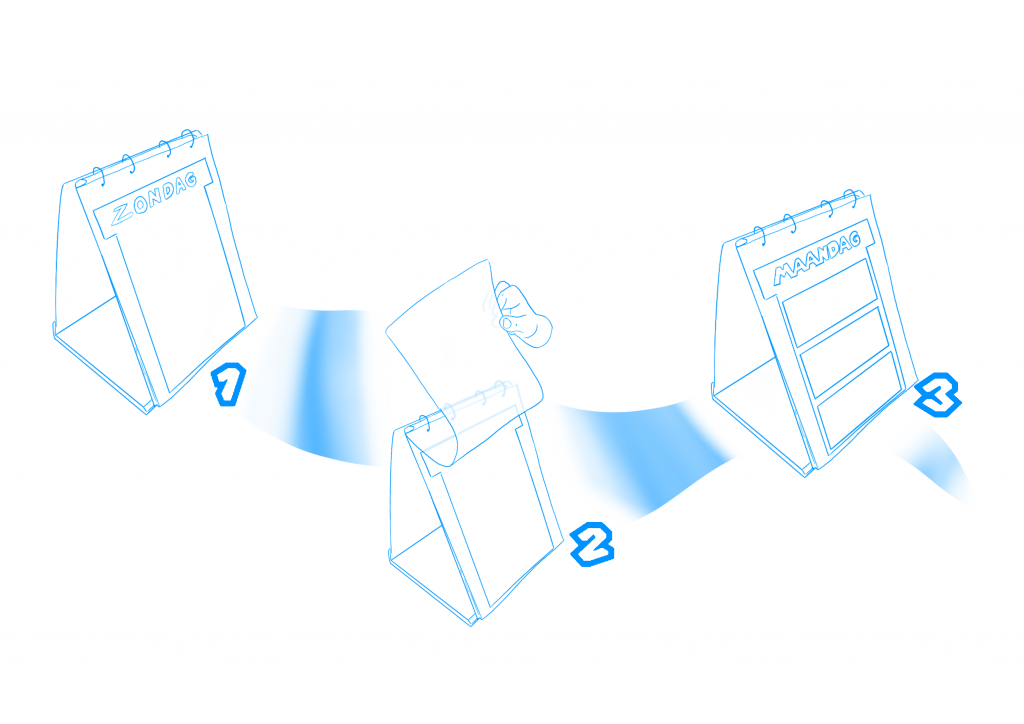
The last storyboard shows that when the user wants to see the planning of the next day, they can flip over the page.
Prototype
A prototype was made of the final design. The pipe for storing the cards was 3d printed and painted green. The pages of the planner were made using a see-through sleeve with a paper image inside of it. A different image can be inserted to suit the users liking. The same goes for the front image of the binder. Where necessary, velcro was attached to the pages using double stick tape. The pen holder was also made of velcro and is also attached using double stick tape.
A concept video that shows how to use the planner and what functionalities it has was made using the prototype. This video can be seen below.
User Testing
In order to evaluate the final design, there will be a user testing session with Thijs. During this session several aspects will be tested. For this a testing plan will be created. Some aspects will not be possible to test during the project, due to limited time or resources, and will therefore be put in a separate testing plan for long-term testing.
| What should be tested? | How could this be done: | |
| 1. | How easy is it to do the weekly planning in advance? | Let Thijs and his coach actually do the planning for the week during the testing session. |
| 2. | How does Thijs follow the planning? | During long-term testing, let the coach monitor how Thijs follows the planner. |
| 3. | Delaying a task, and how does Thijs deal with this? | If this occurs during long-term testing, let the coach take record of the effect this has on Thijs. |
| 4. | Can Thijs flip the planner to the next day? | Actually let Thijs perform the task of flipping through the planner. |
| 5. | Does the Mario theme help Thijs’ motivation? | After long-term testing, discuss with Thijs how he feels about the theme and also on the associations between characters and tasks he can make. |
| 6. | Can Thijs and his coach make new task cards and/or layout pages using the provided template(s)? | Let Thijs and his coach try to make cards themselves with the provided templates and instructions. |
| 7. | Can Thijs get the pen out of the holder to cross of a task and put the pen back? | Give the planner to Thijs with the pen in the holder and ask him to cross off a task. Take notes on how he does this, particularly in the motor skills area. |
| 8. | Does the planner meet Thijs’ expectations? | This can be asked during the testing session, first ask Thijs, then his coach, also pay attention to body language; does he really like it or is he being nice. |
| 9. | Does Thijs think it will help him? | Aks him: how often will he use it, will he stick to it, does he see himself using still using it in 3 months, how will this change his situation. If he is not able to answer, ask his coach to make an estimation. |
As discussed, the tests above can be divided into two categories: the long-term tests and the testing session tests. These testing session tests mainly consist of testing physical aspects and specific tasks of the planner. Doing this testing of specific tasks can be classified under functionality testing. The goal is to find out to what extent Thijs can use the planner, are there any limitations?
When doing any testing it is important to establish an expectation. This way, results can be compared to the expectation. When they are not similar at all, this shows that either the testing method was wrong, or the tested component is far below the expectation.
| What should be tested? | Expectation: | |
| 1. | How easy is it to do the weekly planning in advance? | This should go smoothly, Thijs and his coach take their time to plan together, and Thijs associates certain tasks with certain characters. |
| 2. | How does Thijs follow the planning? | It might take some time getting used to following a planner, but in the end it should be clear for Thijs what tasks he has to do during his day. |
| 3. | Delaying a task, and how does Thijs deal with this? | Hopefully, this does not happen often. The planner was not time-based exactly for this purpose. If it happens, hopefully Thijs sees the moving of a task as simple, since there is no longer a time attached to it. He would just move it to ‘later’ not a specific time. |
| 4. | Can Thijs flip the planner to the next day? | As the planner is large, no fine motor skills would be required. Perhaps grabbing a single page to flip is the biggest issue, but the pages are spaced out from each other due to the thickness of the velcro, which should make it easier to grab a single page. |
| 5. | Does the Mario theme help Thijs’ motivation? | As this was co-designed with Thijs to suit his preferences, the theme should perfectly fit him. This would be a planner that he wants to use. |
| 6. | Can Thijs and his coach make new task cards using the provided template? | It is expected to take some time because the co-designer would have to buy some essential parts in order to make the cards. |
| 7. | Can Thijs get the pen out of the holder to cross of a task and put the pen back? | The crossing does not have to be precise, so he should be able to manage. The holder for the pen was designed as simple as could be so hopefully this is not an issue either. |
| 8. | Does the planner meet Thijs’ expectations? | The planner was co-designed with him, so it should meet his expectations. |
| 9. | Does Thijs think it will help him? | Hopefully, as the planner is what he asked for. |
Finally, the actual testing needs to be done. For short-term testing the following table was made:
| Instruction: | Attention points: | Result: | |
| 1. | Let Thijs and his coach set up the planner for the next week. | Does he use the character associations? | |
| 2. | Ask Thijs to open the planner, flip to the correct day, and then close the planner again. | Does Thijs understand how it is set up? Can he easily flip the pages? | |
| 3. | Ask Thijs to cross of a task with the pen from the holder, also ask him to put the pen back. | Pay attention to motor skills. Does he put the pen back himself? | |
| 4. | Ask Thijs if he is happy with the results; how it looks, how it functions etc. | ||
| 5. | Ask Thijs if he thinks it will help him, how often will he use it, does he see himself using it in 2 months, how will it change his situation |
For long-term testing the following table was made. Part of these results should be gathered by the coach, during normal, daily use of the planner.
| Instruction: | Attention points: | Result: | |
| 1. | Does Thijs follow his planner? How many times a day does he look at it? Does he do the task in the part of the day that was intended for it? | ||
| 2. | Does it occur that Thijs cannot complete a task within the intended time of the day? How does he deal with this? Is this any different than before? | ||
| 3. | Does the Mario theme have any effect? Does he use the character associations? | Does he use a character for all tasks, or only the nice or annoying tasks? | |
| 4. | Ask Thijs if he feels like the theme helped him or if he likes it | This one can be done after a little while, be the coach or one of the team members | |
| 5. | Ask Thijs and his coach to make new layout and activity cards. | See if they are able to do this on their own with the provided instructions once they have bought the necessary items. |
Conclusion
Evaluation Requirements
In order to evaluate the final product that was designed, it will be compared against the requirements that were made in the Context phase.
| Requirement | Fulfilled |
| 1. The product should display one day at a time | Yes |
| 2. The product should allow the co-designer to plan at least one week ahead of time | Yes |
| 3. Timekeeping on the product should be limited to parts of the day (morning, afternoon and evening) | Yes |
| 4. The product should allow the co-designer to postpone tasks if he cannot complete them | Yes |
| 5. The product should allow the co-designer to keep track of what tasks he has finished | Yes |
| 6. The product should help the co-designer maintain motivation to plan his day | Should be tested |
| 7. The product should have a maximum dimension of 360mm x 260mm x 80mm | Yes |
| 8. The product should be usable with the co-designer’s motoric skills a. The co-designer should be able to plan tasks without having to write them down b. The co-designer should be able to open the planner by himself c. The co-designer should be able to close the planner by himself d. The co-designer should be able to flip the pages by himself e. The co-designer should be able to attach the task cards to the planner by himself f. The co-designer should be able to remove the task cards from the planner by imself g. The co-designer should be able to put the pen in the penholder by himself h. The co-designer should be able to remove the pen from the penholder by himself | Should be tested |
| 9. The co-designer and his coach should be able to change the aesthetics of the planner without help from the design team | Should be tested |
The final design fulfills almost all requirements. There are a few requirements (6,8 and 9) for which it is uncertain whether they are fulfilled yet. This is because in order to evaluate these requirements, user testing is needed. Requirement 8 can be evaluated based on short-term user testing, while requirement 6 and 9 can only be evaluated after long-term user testing.
Final Conclusion
The design challenge of this project was to use participatory design to create an easy-to-use day-by-day planning system that fit Thijs’ need to structure his day and motivates him to keep track of his tasks. After evaluation, it was concluded that the final design fulfills almost all the requirements. The ones that are not fulfilled yet, still need to be evaluated during user testing in the future, but have a high likelihood of being fulfilled. Because of this, it can be concluded that de design challenge was successfully completed.
Sources
Besides personal communication with the co-designer and his coach, the following sources were used:
[1] I made a 3D version of Yoshi’s island from super mario world! (2020) Reddit. Available at: https://www.reddit.com/r/gaming/comments/j0xpgt/i_made_a_3d_version_of_yoshis_island_from_super/ (Accessed: April 11, 2023).
[2] Craddock, R. (2019) This 3D model of Super Mario World is breathtakingly beautiful, Nintendo Life. Nintendo Life. Available at: https://www.nintendolife.com/news/2019/03/this_3d_model_of_super_mario_world_is_breathtakingly_beautiful (Accessed: April 11, 2023).
[3] Agnello, A.J. (2020) Wii U’s wild ride in captain Toad’s treasure tracker, Engadget. Available at: https://www.engadget.com/2014-06-10-wii-us-wild-ride-in-captain-toads-treasure-tracker.html?guccounter=1&guce_referrer=aHR0cHM6Ly9sZW5zLmdvb2dsZS5jb20v&guce_referrer_sig=AQAAAH-Kj6yOsYBJm8zI_emYZWWNpxDG3IijQtbdSXfDmMLHa8sNSCoK42YT8WWYHq7QU_dfW0zicsrwuvNftgY2JLeli9O3RBbuma4F9nkNzkOxAFTy4z7SgkMai2iPIg81smEe42avIosLp8LJKlsW1wJJYpfjYtNUoPucY03YMxC4 (Accessed: April 11, 2023).