Install WordPress
First: create a new site and add a database
Before you can install WordPress on your site, you have to sign-up for a portfolio site via the link '+ New' in the menu. Do not forget to add a database (set the option). If you already signed up, but did not add a database yet, you can add a database, just go to the 'New' page. Also, if you forgot your database password, go to the 'New' page to reset your password.
Basic steps
These are the basic steps you should take. Each step is described in detail below.
- Download WordPress and upload it to your site
- Start installation in browser
- Use the dashboard
- Recommended settings, fixes and tips
- Learn more
1. Download WordPress and upload it to your site
Download the zip-file of WordPress from Wordpress.org. Extract the contents of the zip-file to a folder where you will keep a copy of your website on your computer. (For instance, in a folder 'Website' in your Documents folder).
Connect to the site with an FTP client like FileZilla. Need help connecting? Click here.
If you consider mixing a html-based site with WordPress, check out this info.
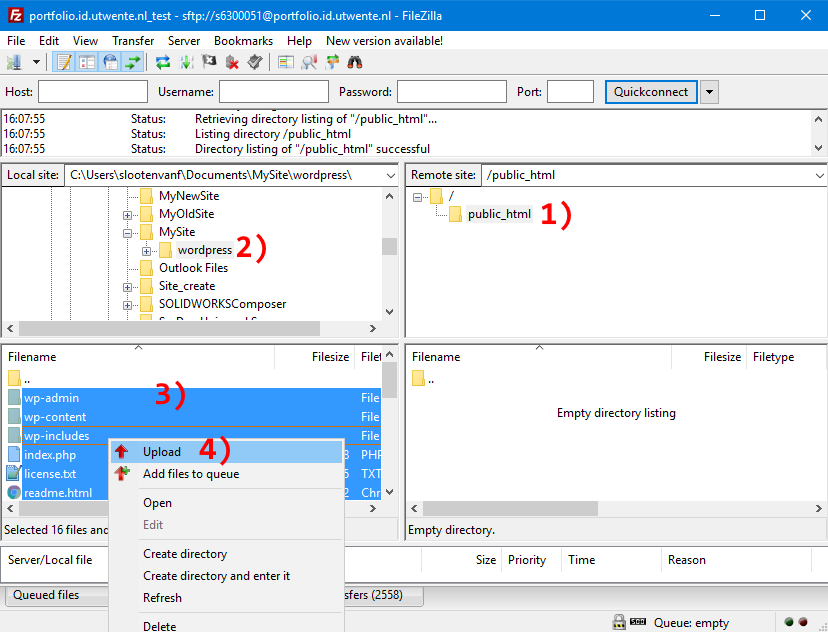
- On the remote site (right side), browse to the folder which contains your site:
public_html - On the local site (left side), browse to the folder on your computer where you extracted the zip-file. Go to the subfolder 'wordpress'
- On the local site (left side), select all files (shortcut: CTRL+A)
- Upload: right-click the selected files, choose Upload. Or simply drag the selection to the right side
WordPress comes with its own index-file (index.php). If you have an index.html file present on your website (eg. for assignment 1), you might want to rename the index.html, eg. to assignment1.html to
keep it available. Then, in your first Blog post, link to this assignment.
2. Start installation in browser
You need database account details for this step
You can find the database account details in the e-mail you received (when you registered the new site). If you do not have the details, go to the 'New' page and press the button 'Reset Database Password' to get a new database password.
In a Web browser, go to your site address.
You should get a Welcome page. Press the button Let's go! to start the installation. Now you have to fill in the database details:
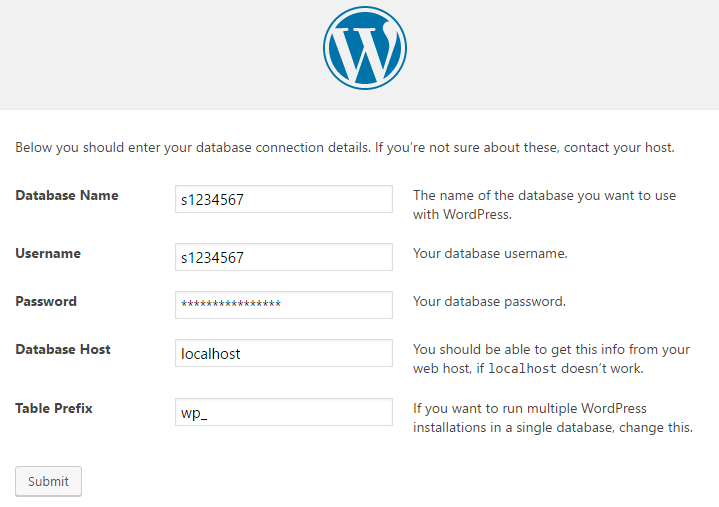
The shown values for Database name and Username are examples. Leave the Database Host and Table Prefix as they are. Fill in the details (from the e-mail you received) and press Submit to continue. Next, click 'Run the install', then fill in the details for your site (example screen below). It is not recommended to use "admin" or your studentnumber as a username.
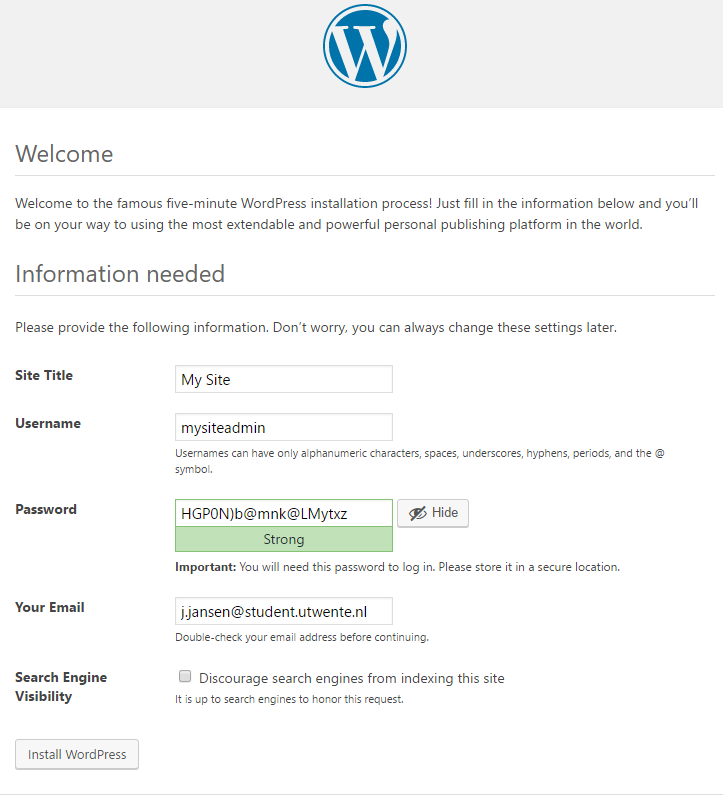
Important: Remember the chosen username and password
Write username and password down somewhere! You need these to access the WordPress dashboard.
Press Install WordPress to complete the installation. If everything went well, you see a "Success!" message. You can then press the "Log In"-button to enter the Dashboard of your WordPress site. But do not forget to do this:
Fix for installing plugins & themes
Before you can install plugins and themes you must modify the config-file of WordPress.
Using FileZilla, on the website (right side) navigate to the folder which contains WordPress (usually public_html), then double click on the file wp-config.php to download it. Next, open it with your editor (eg. Atom) and
add the line given below to the end of the file.
define('FS_METHOD','direct');Make sure to add an extra line after that (press Enter after inserting the line). After that, save the file and upload the it back to the website. Now you should be able to install plugins and themes.
3. Use the dashboard
Access your dashboard
After you finalized the installation, you will receive an e-mail notification which contains a link to your site and a link to the Dashboard. If you ever forget the address of the Dashboard, it can be reached by adding wp-login.php to
the address of your site. An example:
https://portfolio.XX.utwente.nl/student/MYSITE/wp-login.php
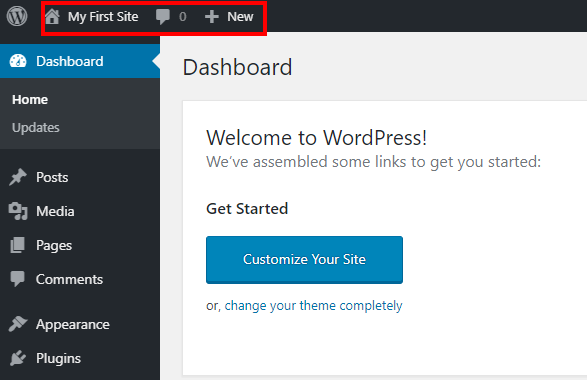
You can use the Dashboard to post messages, create pages, configure settings, themes, plugins etc. The top area contains shortcuts to for example post a new message and to go to the homepage of the site:
Post a first message
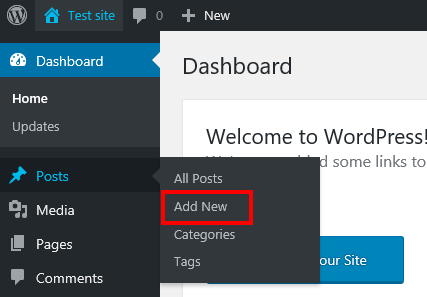
To post a message to your Blog, click "Add New" from the Post-menu:
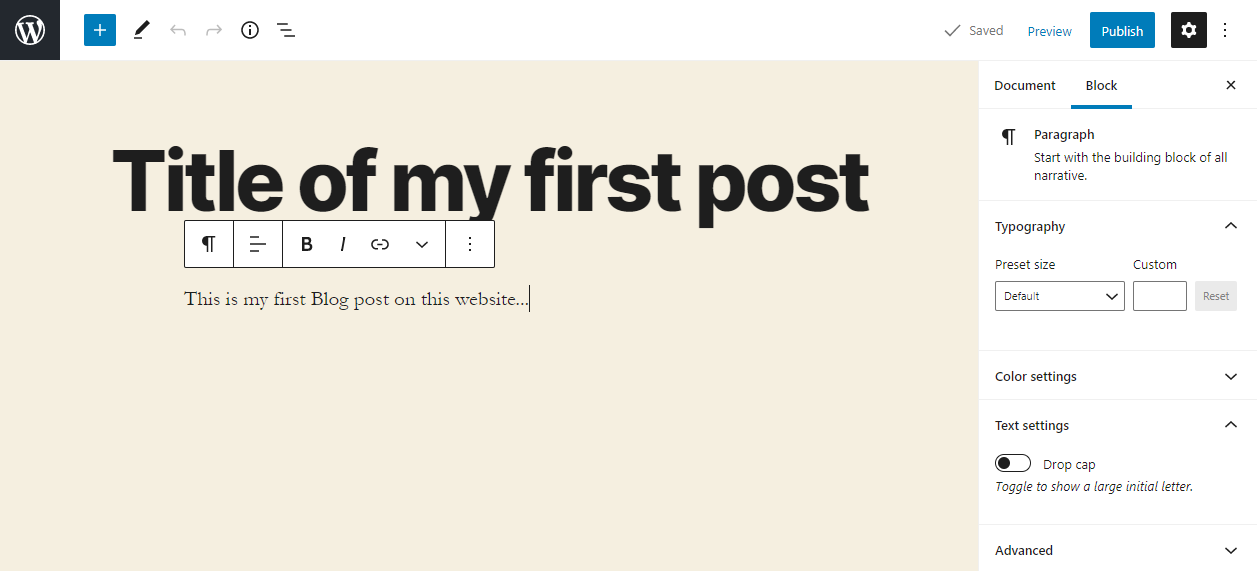
Enter the title and the content of the message:
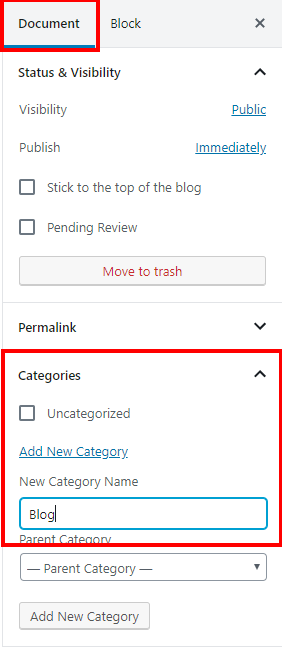
Next, add a category (in the sidebar, click Document, then Categories):
Finish your first post by pressing the Publish button:

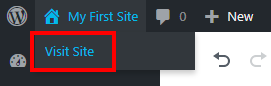
Check if it appears at your website:
HTML editing in a post or page
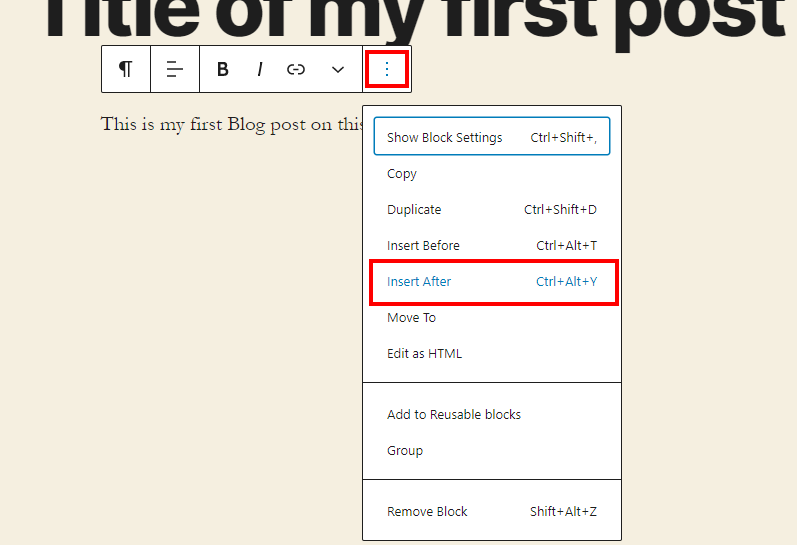
When editing a post or page, you can use HTML (and CSS) code if you want, via the block-menu (under the 3 dots), by selecting "Edit as HTML". Another way is by adding a Custom HTML block which we will show below. First, add a new block by pressing the Enter key or via the 3-dot menu and choose Insert After:
Then, click the plus-sign next to the block, and choose "Custom HTML" (under Formatting), or just search for 'html':

And add the HTML code:
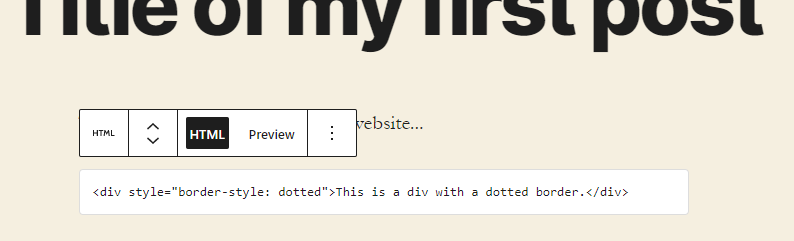
You can see a preview if you click the Preview button. You can learn more about the editor here.
4. Recommended settings, fixes and tips
Improve security
It is strongly advised to install a plugin to enhance the security of WordPress. Plugins like WP Cerber Security enhance the security and protect your site from for instance hackers.
Select Plugins > Add New and search for "WP Cerber", then install and activate that plugin.
Go to the Main Settings and set the Load security engine setting to Standard mode.
Further help with setting up the plugin can be found here.
A good alternative to WP Cerber is Wordfence.
Set the right time zone
In Settings > General select the right time zone at "Timezone".Have nice links for blogs and pages
Go to Settings > Permalinks and for instance choose 'Post name' as the preferred way to create links to Blog articles and Pages.
Add a theme
Go to Appearance > Themes to change or add a theme. A theme can be used to change the appearance (layout, style, fonts etc.) of your site. You can browse for ready-made themes via the "Add new" button. If you find a nice theme, you can Install it. After you installed a theme, you can get a Live Preview of that theme, to see how your site looks with that theme. If you think it is Ok, you can Activate that theme.
Customizing a theme
You can freely customize a theme via the Customize entry in the menu (or the button Customize in the overview of themes). However, the amount of customizing you can do varies per theme. Most themes have an option to add additional CSS
styling. For instance the default theme Twenty Seventeen has the option "Add additional CSS" in it's menu: (you may need to over-rule default styles using the !important tag in CSS).
In some cases, the "Add additional CSS" might not be sufficient (or available) and you might be tempted to change the stylesheet of the theme, which you can edit via Appearance > Editor. However, it is not a good idea to change the stylesheet of a theme directly, as the theme might receive updates, and your changes might get overwritten. If you want to customize the stylesheet of an existing theme the best way to do that is to create a child-theme of the theme.
Add a menu
Go to Appearance > Menus, at the field "Menu Name" type a name for your menu and press "Create Menu". Next, at "Menu Settings" check the options you want. The option "Automatically add new top-level pages to this menu" can be handy. Also, if this will be the main menu of the site, check "Primary Menu".
You can now add pages or other content to the menu by using the dialog at the left. For example, check the pages you would like to add under "Pages" and press "Add to Menu". At the left side you can now drag the links to order the menu as you wish.
Change the homepage of your site (to a static page)
If you do not have it yet, create a page first. In this example we have a page named "Home". Then, go to Settings > Reading. At "Front page displays" select "A static page" and select the page. Press Save Changes.
Because your Blog-posts might become inaccessible this way, you might consider:
Add Blog posts as a link to the menu of the site
Add a new page (Pages > Add new) and give it a title, eg. "Recent posts" or "Blog". Now go to Settings > Reading. At "Front page displays", next to "Posts page:" select the page you just created. Press Save Changes. It should be automatically added to the main menu of the site. If not, add it manually via Appearance > Menus.
Review settings for comments
Review all settings under Settings > Discussion carefully. If you do not want to receive comments, uncheck (remove checkmark) "Allow people to post comments on new articles".
To disable comments for non-authorized users (like spam-bots)
check "Users must be registered and logged in to comment".
Why? This prevents automated spam bots to flood your site with comments. If you really like to receive comments, activate the Akismet plugin. To completly disable all comments, install
the plugin Disable comments.
No e-mail notification of comments
In Settings > Discussion: uncheck al options under "E-mail me whenever".
Categories/permalinks/menu links not working?
If you for instance click on a category and you get an error that the page cannot be found, or have links in a menu that no longer work, you might have to update the Permalink-structure: in the Dashboard go to Settings > Permalink and press "Save changes". If that does not solve problems with menu's, try to re-create the links in the menu that do not work (delete them and make new links).
What if I forget my password (for the Dashboard)?
At the login-page there is a "Lost your password?"-link below the Login-form. Follow the steps there. As long as you remember which e-mail address you used to register the account, you are safe. If you are unsure which e-mail address you used, scan your
Inbox for a mail with subject "New WordPress Site".
More information on resetting your password is available here.
If you need access to the database, you can use PHPMyAdmin.
More tips
- How to display recent posts from a specific category In WordPress
- WordPress-app to manage your Blog from your phone
Manage the database
Use PHPMyAdmin to view/administer your database.
5. Learn more
Recommended reading:
- Articles about Wordpress on Fjodor's Blog
- Wordpress.org's "First Steps with WordPress"
- WordPress Security Guide - important, take some time to study this!
- Wpbeginner.com
- Tutsplus WordPress tutorial
Need more help?
Check the FAQ page. If you keep getting problems, use the chat to ask a question or contact us for help via email.